D o you want to learn how to start a podcast? Then, you’ve come to the right place. In this guide, we’ll walk you through starting your podcast and publishing it on your WordPress blog.
If you’ve started a blog and are looking to reach a wider audience, then branching out to podcasting is a great idea. With podcasts, people can listen to your content while they’re on the go. So, it’s the perfect way to capture the attention of people that don’t have time to sit down and read your blog posts.
Starting a podcast isn’t difficult, but it does require you to go through some steps to get it launched. This guide will hold your hand through every single step of the way. Simply follow this tutorial to create a successful podcast and get your voice heard.
So without further ado, let’s get started.
In This Guide:
First, if you’re not familiar, we’ll go over what a podcast actually is…
What is a Podcast and How Does it Work?
Podcasts are a great way to easily share your knowledge on a particular subject, conduct interviews with experts, or simply chat about whatever’s on your mind.
For bloggers, starting a podcast has a number of advantages, including:
- Reach New Audiences – Many people aren’t interested in reading blog posts but love listening to podcasts. So, you can attract a whole new audience to your podcast, even if it’s the same content as your blog.
- Increase Dwell Time – By adding a podcast to your blog, you can increase the amount of time users spend on your website before returning back to the search engine results, which is known as dwell time.
- Improve Website SEO – If you transcribe podcast episodes on your blog, which means creating a written version of what was talked about in each episode, you can rank for relevant keywords and improve your SEO.
- Grow Your Business – You can use your podcast to promote your products or services to generate leads and boost sales.
And there are many bloggers out there that have their own successful podcasts.
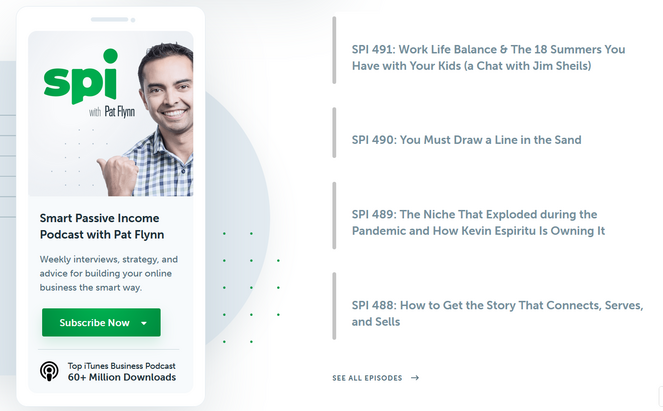
For example, Smart Passive Income is a podcast that is managed and run by Pat Flynn on his blog of the same name. It’s a weekly podcast that shares advice on how to build an online business the smart way.
Here are some other blogger-created podcast examples:
- ProBlogger is a popular podcast run by Darren Rowse. This weekly podcast covers topics like producing content, placing ads, promoting your work, and life as a solo entrepreneur.
- Achieve Your Goals by Hal Elrod is an inspiring weekly podcast that offers practical strategies for achieving your goals and living a fulfilling life.
- Limitless Life is a personal development podcast hosted by blogger Melyssa Griffin. In the biweekly epsoides she interviews entrepreneurs that have valuable life lessons to share.
But, how does a podcast work?
For a podcast to work, you need an audio file and an RSS feed that users can subscribe to. Many podcasters use WordPress as their podcast website platform because it has a built-in RSS feed for blogs.
You can also connect your podcast to streaming services like iTunes, Spotify, and Stitcher to make it easier for millions of people to discover and subscribe to you.
Now that you know what a podcast is and how it works, let’s dive into teaching you how to start your own podcast.
Step 1: Pick a Niche
First things first, if you’re going to launch your own podcast, you’ll need to decide what you’re going to talk about.
It’s best to choose one specific topic and stick to it. Choosing a niche for your podcast will help keep it focused and make it easier to attract a loyal, target audience.
Because imagine if your podcast was about sports, marketing, travel, and motherhood. Most people aren’t interested in all of those things. So, they wouldn’t be encouraged to subscribe and even if they did, they wouldn’t listen to all of your episodes.
If you already have a blog, you have a headstart on choosing a niche. You should pick a podcast niche that’s similar to your blogging niche. This will help you present yourself as an expert in the subject and build your brand. Plus, you’ll already have an audience (your readers) that will be interested in listening to your podcast.
For example, the travel blog Extra Pack of Peanuts, has a podcast of the same name. Both the blog and podcast cover topics that help people travel the world on a budget.

If you don’t know what your niche is yet, here are some questions you should ask yourself:
- What are you passionate or knowledgable about?
- Who is your podcast for?
- What topics will you discuss?
- How will it be different from other podcasts?
- Will you interview any guests?
- Will you have a co-host?
Write down your answers and start brainstorming topic ideas from there. Once you’re finished, you can start to narrow it down and come up with more specific ideas.
If you’re afraid of picking a topic that a lot of big podcasts already cover and you won’t be able to compete, don’t worry. Your unique personality, perspectives, and voice will help you stand out from others. Just be yourself and talk to your audience the way you write your blog posts.
Plus, you can also put a spin on popular topics that are covered a lot. For instance, instead of creating a podcast about fashion, you can narrow it down to a more specific topic like 80s fashion to stand out from the crowd.
Next, let’s go over what is needed to start a podcast…
Step 2: Podcast Essentials
You can’t launch a podcast without proper equipment. First, we recommend purchasing a good microphone. Since podcasts are audio content, it’s important that listeners are able to hear your load and clear.
If you’re on a budget, you can start off with a microphone like the Samson Q2U Handheld Dynamic USB Microphone Recording and Podcasting Pack.
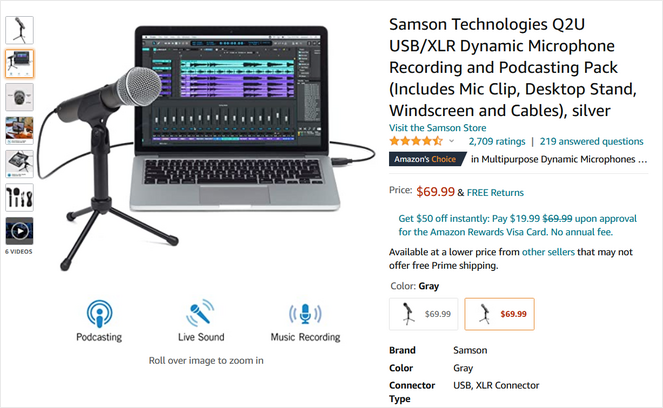
It’s easy to set up and it’s affordable. All you need to do is plug it into your USB port and you’re good to go.
If you’ve got money to spare, you should look into getting the Heli PR-40. This is what the pros use. You’ll need to buy an audio mixer along with this microphone.
Other than a microphone, you might also need:
- Mic arm
- Shock Mount
- Pop Filter
- Headphones
Now that you have all that you need, let’s move on to the next step.
Step 3: Create a Podcast Website
To start a professional podcast, you need a website or blog where people can learn more about you and what your podcast is all about. Plus, you can make your podcast episodes available right on your site.
If you already have a website or a blog, you can skip this step. If not, then just follow our instructions.
To create a website, you first need to choose a good blogging platform. We always recommend using WordPress.org. It’s free to use, it has endless customization options, you can monetize your blog any way you want, and it has the RSS feed features that we mentioned earlier.
If you want to learn more about why WordPress.org is the best, take a look at our post on the best blogging platforms.
To launch a blog on WordPress.org, you’ll also need a domain name and web hosting.
A domain name is the URL of your blog, which users will need to type in their browsers to reach your site. Web hosting acts like a house on which your blog resides. All of your files and images are stored there.
All of this might seem like a lot, but that’s why we recommend Bluehost to our readers. It’s the best web hosting service on the market and it’s very reliable. Plus, it comes with everything you need to start a podcast website including a free domain name and 1-click WordPress installation.
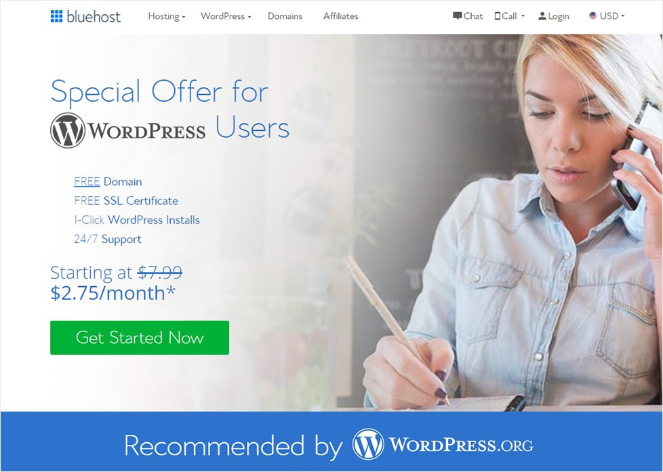
The best part is that Blog Tyrant readers get an awesome deal:
Exclusive offer for BlogTyrant readers
We have partnered up with Bluehost to get 60% off for our readers! You also get to register a FREE domain for a year which normally costs around $14.99 per year.
Claim this Exclusive Bluehost offerOnce you’ve signed up for Bluehost by clicking the link above, you can follow our tutorial on how to start a blog for step-by-step instructions.
Step 4: Set up a Media Hosting Service
Podcast audio files are pretty big so serving them from your own blog will eat up your resources and slow down your site.
That’s why we recommend using a good media hosting service to save your podcast files and serve them more efficiently.
For the best experience, we recommend using Blubrry. Its services are specifically dedicated to hosting podcasts.
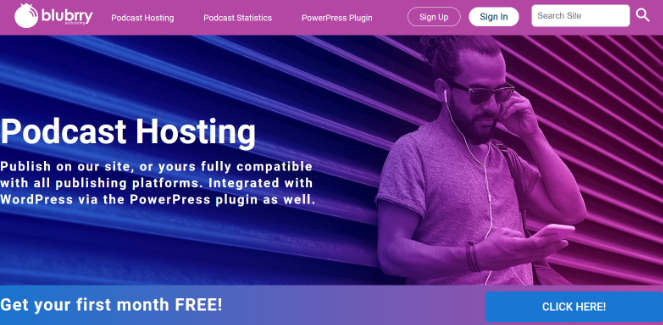
Blubrry makes your content delivery much faster and more reliable. They even have a WordPress plugin that makes it easy for users to manage podcasts right from their WordPress blog.
Furthermore, Blubrry also has tools for iTunes optimization, ID3 tagging, automatic media artwork management, and much more.
Now that you have your equipment, a WordPress website, and a media hosting service, it’s time to start planning out your first podcast episodes…
Step 5: Plan Your First Few Podcast Episodes
Instead of just sitting down and recording a podcast off the top of your head, it’s better to plan out your first few episodes. By planning out your first few episodes, you’ll be able to create cohesive content that your audience will enjoy.
There are a few things you should consider when you’re planning your episodes:
Episode Content
Of course, you should decide what topics you’re going to talk about in your first few episodes. Once you’ve chosen the topic, you can create an outline for the main points you’re going to discuss in the episode, similar to writing a blog post.
Then, you can create a full script, which we’ll go over at the end of this section.
Episode Length
A typical podcast episode can be anywhere from 20 minutes to over 1 hour. There’s no strict rules on how long your podcast episodes should be, it really depends on your specific podcast, audience, and the episode content.
But recording long podcasts takes more work. So, try out shorter episodes to start. Then, if you find that you have lots of information to share or that your audience wants more content, you can start recording longer episodes in the future.
Supporting Media
You also need to decide on the supporting media of your podcast. For example, you might want catchy intro music to draw listeners in, background music to make your content easy to listen to, and other sounds for dramatic effect.
You can find free music and sound effects for your podcast on sites like Free Music Archive and SoundBible. Just remember to review the licensing terms before you choose a track for your podcast.
Script
Lastly, you should create a full script for each podcast episode. Writing down exactly what you’re going to say will keep you from stumbling on your words, help you present information that flows from one sentence to the next, and make your podcast sound more professional overall.
As you get more comfortable, you won’t need to follow a script so closely. In fact, going off-script will make your podcast more personable and relatable.
Now that you’ve spent time planning out the content of your podcast, it’s time to record it!
Step 6: Record Your First Podcast
To start recording your first podcast, you’ll need a software called Audacity. With this free tool, you can easily record and edit your audio.
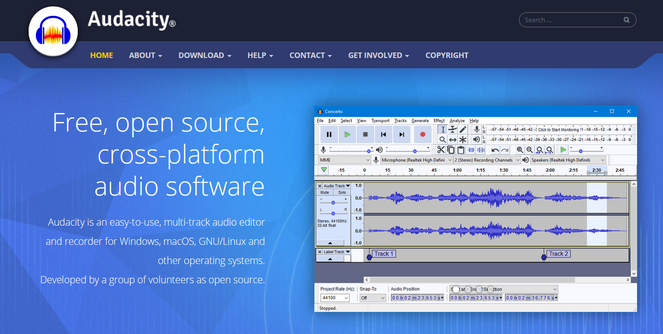
First, you need to first install and run the software on your computer. Then go to Software » File » Start a new project. You can now start recording your podcast after hitting the red Record button.
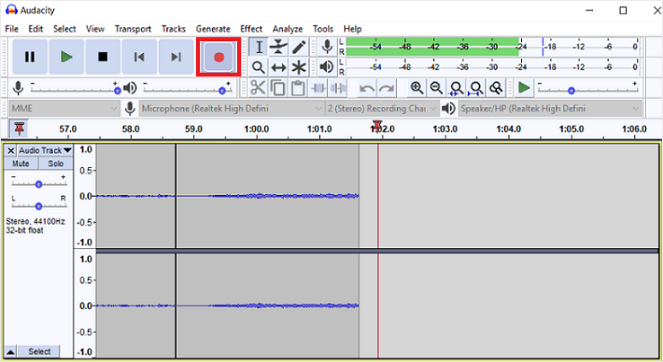
You can edit your podcast by removing any unwanted sounds like sneezing and coughing. You can even remove awkward pauses and anything that you think is unnecessary.
You can also use Audacity to add your own music. Go to Files » Import and upload the audio files you want.
If you’re looking to learn more about Audacity, then check out their wiki for detailed tutorials.
Once you’ve recorded your podcast, the next thing you need to do is export your file and save it in MP3 format since it’s of a smaller size.
Step 7: Publish Your Podcast on WordPress
To be able to publish your podcast on WordPress, you’ll need to install a free plugin called PowerPress Podcasting plugin by Blubrry.
Once you’ve installed and activated the plugin, go to your WordPress dashboard and click on PowerPress » Settings.
When you’re on the Settings page, click on the Configure Blubrry statistics and Hosting services button.
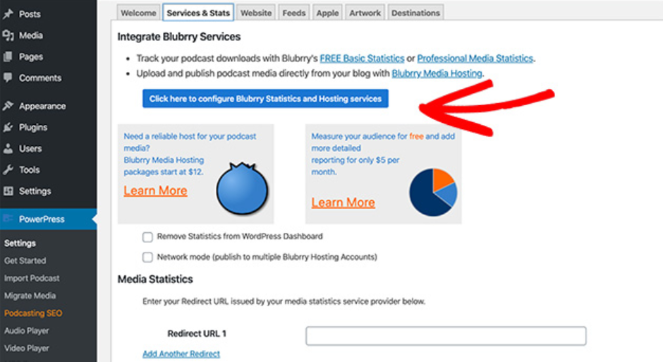
A window will then pop up where you need to enter your Blubrry username and password.
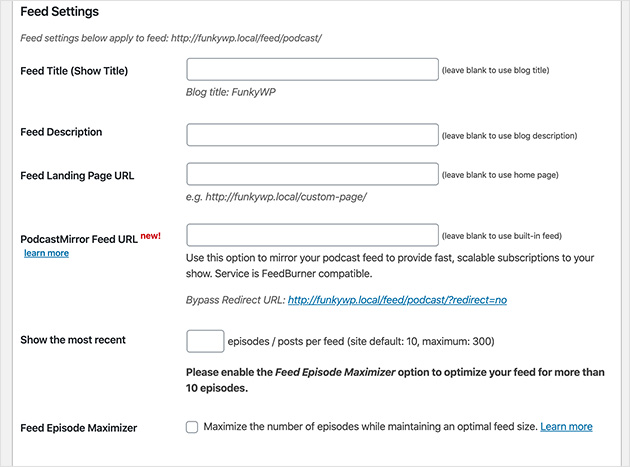
After entering your login credentials, you can then fill out the rest of the information on the Settings page.
You can add the podcast title, description, and iTunes details. Once you’re done, save the changes, and your blog will be ready to start publishing your podcasts.
Step 8: Upload Media Files to Blubrry
To publish your podcast on WordPress, you need to upload your media file to your Blubrry account first, like we discussed earlier on.
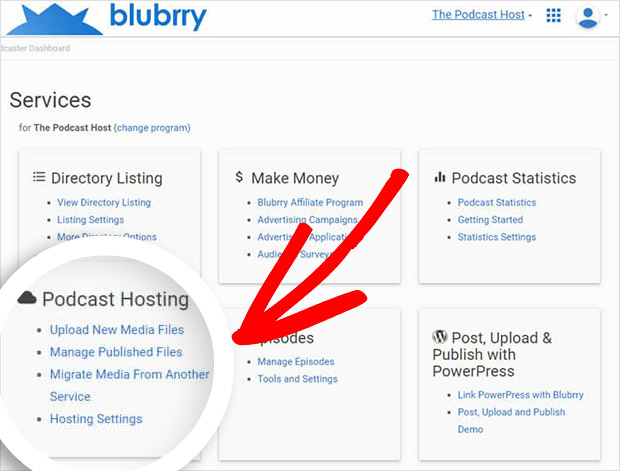
To upload your files, simply log in into your Blubrry account and then go to the Podcaster Dashboard » Podcast Hosting » Upload New Media Files.
After clicking the button, you’ll be taken to a new page where you can upload your podcast files by hitting the Upload New Media button.
Once your podcast files are uploaded, you can now use them on your WordPress blog. We’ll show you how to do that now…
Step 9: Add Your First Podcast to WordPress
To add your first podcast to WordPress, you’ll want to sign up for an account with Fusebox. Fusebox offers a smart podcast player plugin that lets you display your episodes in WordPress beautifully.
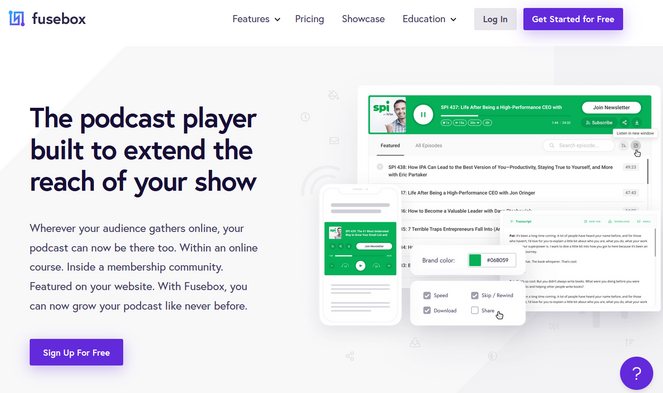
Fusebox’s free account allows you to display a single track player and comes with features like brand color select, call to action, subscribe links, and a transcript WordPress plugin.
If you want to display more episodes in an archive playlist, you’ll need to opt for the paid plan starting at $15.83 per month.
Once you’ve installed and activated the plugin, go to Settings » Fusebox Player. If you have the paid version, you need to enter your license key first.
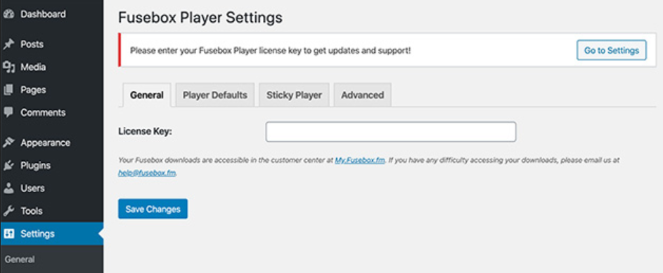
Next, click on the Player Defaults tab to configure the settings.
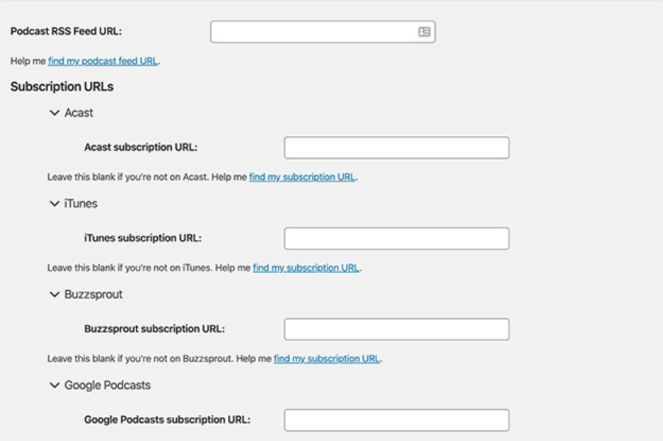
On this page, you need to enter your podcast RSS feed URL, iTunes subscription URL, the show’s name and artist, and other details.
If you haven’t submitted your podcast to iTunes yet, don’t worry. You can always come back to this step and update it with your iTunes subscription URL once you’ve got it.
You can also customize the look of your podcast player by choosing the theme style, color, image, button styles, and more.
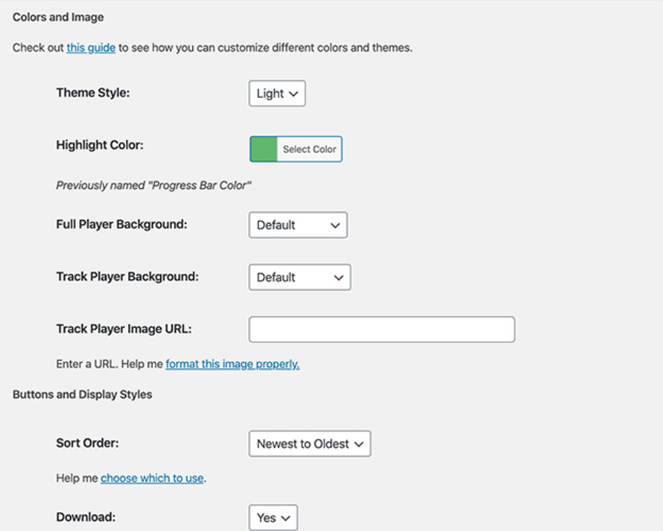
Once you’re finished configuring the settings, click the Save button.
Since you’re using Fusebox to display podcast episodes on your blog, you need to deactivate the built-in PowerPress player.rnrnTo do this, go to PowerPress » Settings and click the Website tab.rnrnThen, click the Disable PowerPress Media Player option and hit Save.
Now it’s time to publish your podcast on your WordPress blog!
To display your podcast in a WordPress post, simply go to Posts » Add New.
To keep your podcasts separate from the rest of your blog content, you can give your podcasts their own category. Click on Add New Category under the Categories section on the right to create a Podcast category.
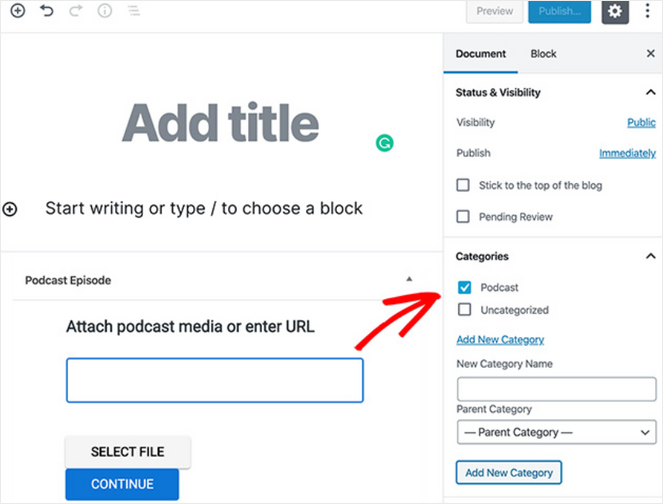
Next, scroll to the bottom of the WordPress editor to the Podcast Episode section. Here you can select a podcast file from your Blubrry account. If you don’t have a Blubrry account, you can paste the URL of your podcast instead.
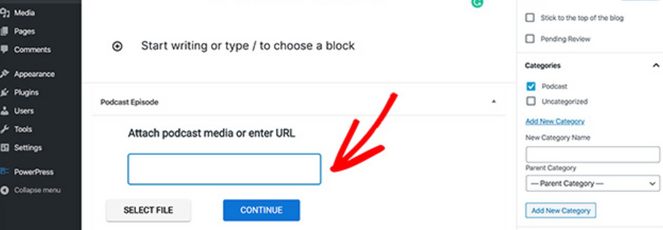
After you’ve selected your file, click the Plus (+) icon to add a new content block to the post. In the search box, type “fusebox” or “player” to find the Fusebox Track Player. Click on it to insert it into your post.
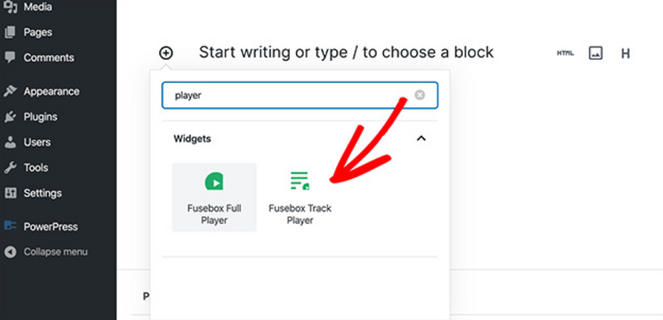
This creates a shortcode for Fusebox so you can display individual podcast episodes. Now you can configure the shortcode by clicking on Edit Shortcode under the Shortcode Builder heading on the right side.
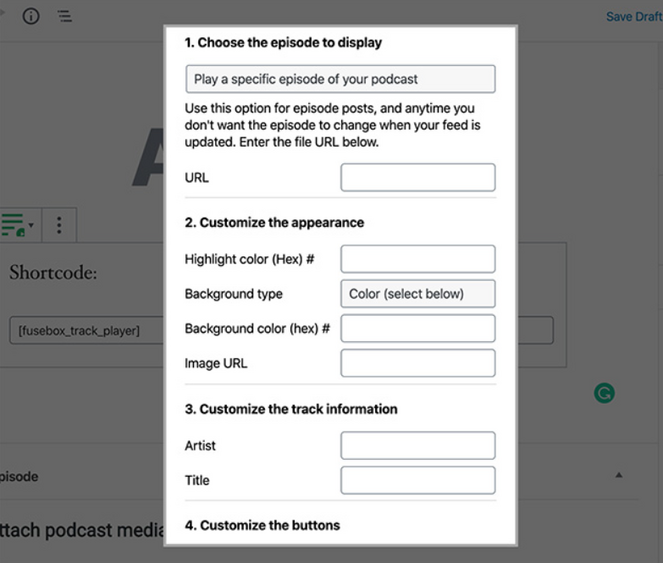
Enter the URL of your podcast episode, which is the media file URL Blurbrry provided you with earlier. Then, click Build Shortcode and the shortcode will appear in the editor.
Now all that’s left is to hit Publish. After publishing the post, when you view it you’ll see your podcast displayed beautifully on your site!
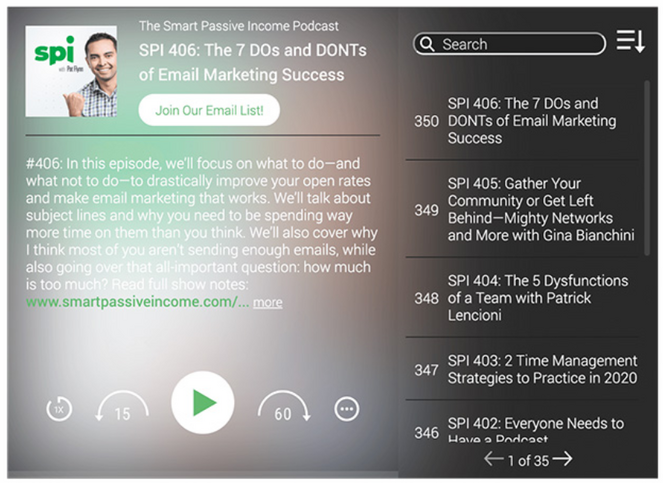
Now, let’s get your podcast some more listeners by distributing it on iTunes…
Step 10: Distribute Your Podcast On iTunes
The process of distributing your podcast on iTunes is straightforward.
All you need to do is go to iTunes Connect, log in with your Apple ID, and enter the URL of your podcast’s feed.
The podcast feed URL should look something like this: http://example.com/feed/podcast
Just replace example.com with your own website domain.
Next, click on Validate. Apple will then provide a preview of how your podcast looks. Review the information, and if everything looks okay, click on Submit.
Then all you need to do is wait for Apple to review your podcast and send you a confirmation email. Once you get that, your podcast is ready to distribute on iTunes.
Bonus: Growing Your Podcast
Before you go, we want to share some tips for getting more podcast subscribers and making money with your podcast.
As we’ve shown you in this tutorial, the best way to grow your podcast is to have it published on your blog. This way, you can encourage your existing blog readers to listen to your podcast.
Another thing you can do is make a video version of your podcast and upload it on YouTube. This will help you attract an even bigger audience from one of the most popular sites on the web.

All you need to do is set up a camera and record yourself while you’re recording your podcast. For more tips, check out this tutorial on how to start a YouTube channel.
You can also use a plugin like Smash Balloon to display the YouTube feed on your blog.
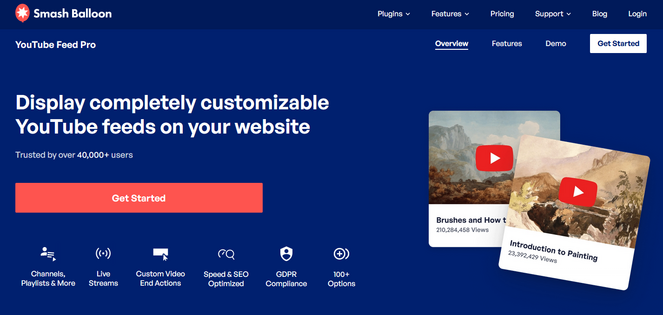
By displaying the video versions of your podcast on your website, you can get more eyes on your YouTube channel, which will, in turn, bring in more subscribers.
Smash Balloon’s YouTube Feed Pro makes it easy to embed a YouTube feed in WordPress. Simply install the plugin, connect your YouTube account, and in less than 30 seconds you can display a beautiful YouTube feed on your site.
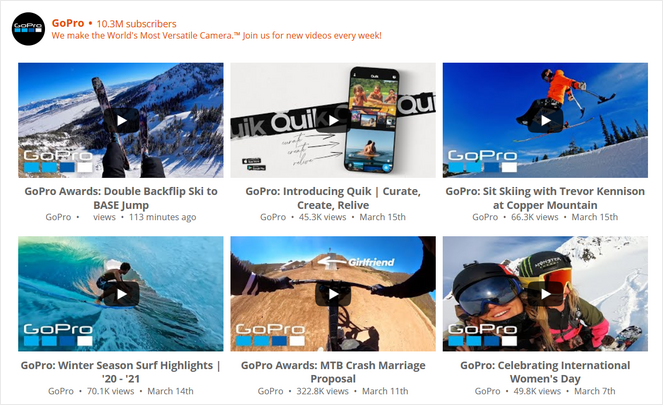
Take a look at this tutorial for step-by-instructions on adding a YouTube feed in WordPress.
And of course, be sure to promote your podcast on social media any chance you get. For more tips, check out our guide to social media marketing.
You can also use your podcast to make money online. We’ve discussed some of the popular methods below:
- Get a Sponsorship: You can reach out to businesses that you think will benefit from your podcast and have them sponsor you.
- Affiliate Marketing: You can recommend a product or service you use and like to your listeners and ask them to use your link if they want to try it out. You will get a commission for every time someone makes a purchase using your link.
- Donations: Many popular podcasts ask their loyal listeners to donate to their podcasts to keep them running. Those who really like your podcast won’t mind donating at all. Check out our tutorial on how to add a PayPal donate button to your site.
That’s all, folks!
We hope that this tutorial helped you launch your own podcast. If you have any questions or want to add any podcasting tips, then sound off in the comments below.
Also, if you want to learn more about your audience and find out if they’re enjoying your podcast, then you might want to read our guide on how to create a survey your listeners will love.
And don’t forget to sign up for our email newsletter so you can get useful content like this sent right to your inbox!

