
D o you want to learn how to start a photography blog?
Keep reading; I’ll share this guide on how to start a photography blog so you can showcase your talent. Starting a photography blog is an excellent way to discuss your upcoming projects, share your adventures, and show off your photography skills with a massive audience.
But how do you build a blog for your photography?
Don’t worry. This guide will show you step-by-step how to start a photography blog.
So get your camera ready; we’re going on a tour!
In This Guide:
Successful Photography Blogs
Before I get to the steps to start a photography blog, here are some examples of the best photography blogs to inspire you.
The first photography blogger on our list is called Light Stalking.
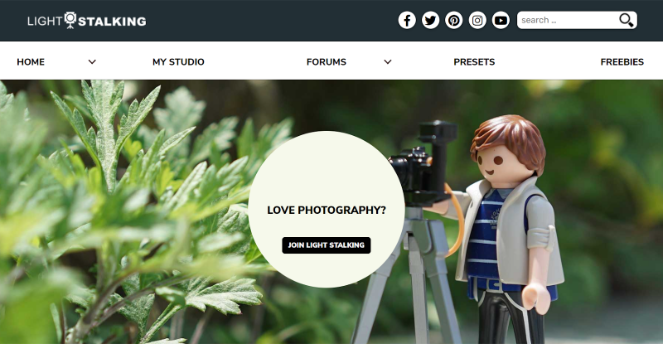
It’s one of the best photography blogs for beginners; it has plenty of tutorials and guides that help new photographers improve their skills.
You could do the same with your photography site if you like writing tutorials for beginners.
The other blog I like is 1000 Words. It was founded by Tim Clark in 2008, and it’s still going strong.

It’s different from other photography blogs because it narrates the story of every post.
A lot of people ask, what do you write in a photography blog? This blog shows that you can create your own stories around the pictures you take. Give it a shot and try narrating one of your own.
If you love traveling and photography, then the next one is for you. The Wandering Lens is a travel photography blog that focuses on different landscapes.
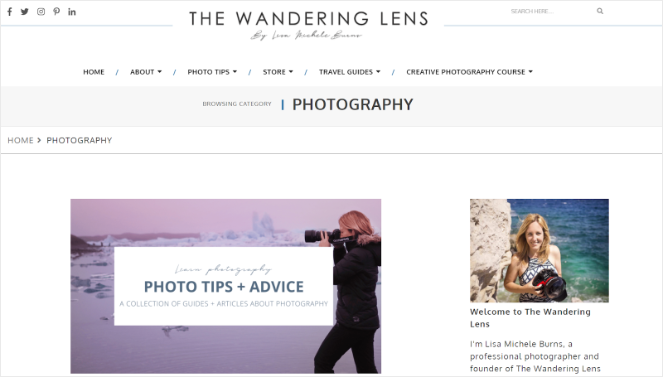
You should definitely give it a visit if you are looking for inspiration to start a travel photography blog.
So, do photography blogs make money? They do!
For example, The Wandering Lens has an online store on the blog where visitors can purchase travel prints, fine art prints, ebooks, online courses, and more.
I’ll go into more detail about how to make money from your photography blog later on.
But first, let’s set up your website…
Set Up Your Photography Blog
In this section, I’ll guide you through some simple steps for how to set up your photography blog. There are a few things you need to know before you can take your blog live.
You need to pick the right blogging platform, a domain name, and excellent hosting service. I’ll talk about this in detail in this section.
1. Choose the Right Blogging Platform
There are tons of blogging platforms for you to choose from when setting up your photo blog, some are free, and others are paid. The free platforms may sound like a great option to start your photography blog, but they have many disadvantages.
Some of the free blogging platforms like Blogger.com, Wix.com, and WordPress.com have the following disadvantages:
- You can’t customize your blog
- They have limited capabilities
- You don’t own your content
- You can’t monetize your blog
If you’re planning to stay in the photography blogging business for the long run, then the free option isn’t the best for you when starting your blog!
So, how do you choose a blog platform?
You don’t have to look any further than WordPress.org, the self-hosted blogging platform that powers 39.5% of the internet.

WordPress is used by big brands like BBC, Wired, Time Magazine, Beyonce, Jay-Z, Rolling Stones, Harvard University, and the New York Post.
Using WordPress.org has many advantages:
- It’s very easy to install.
- You can customize your blog any way you want.
- Use themes and plugins to help you create a professional photography blog without a designer’s help.
- Grow your blog by adding features like a paid membership or even an online store. This makes WordPress.org the best blogging platform to make money.
- WordPress is 100% search engine friendly. This makes it easy for you to rank your blog on search engines.
It doesn’t matter if you’re a complete beginner or if you’re an experienced blogger. With WordPress.org, you can create, design, and customize a blog and start making money in no time.
2. Pick the Perfect Domain Name
Now that you’ve picked a blogging platform, your blog needs a domain name.
A domain name is a fancy name for a web address or URL that people will type into internet browsers to get to your photography blog.
Your domain name will be your identity and brand on the web.
If you want to make a name for yourself in the photography space, then you need to take your time to choose the best domain name.
This can be a very time-consuming process and can also be very frustrating. But I recommend using a tool like Nameboy to make it easier.
Nameboy is a domain name generator that suggests the best domain name ideas for your business.
Their artificial intelligence algorithm combines common words, random words, prefixes, suffixes, and search keywords to make domain name suggestions suitable for your needs.
But tools are only as good as how you use them!
Before picking a domain name, you need to consider the following:
- Use a .com domain name because .com means you’re international, and you can appeal to any geographical location.
- Pick a broad domain name that will let you expand. Instead of picking a specific name like mountainphotography.com, choose a broad name, for example, everythingphotography.com.
- Keep it short because long names are hard to remember!
- Make your blog name memorable by using wordplay.
- Be creative and combine different keywords like The Phoblographer of Photo Focus.
With these tips and with Nameboy’s help, you will be able to come up with an excellent domain name for your photography blog.
Once you’ve found the domain name, register it with a domain name registrar like Bluehost. You can get a domain name for free with our referral—more on that below.
3. Choose the Right Blog Hosting Service
You’re one step closer to taking your photography blog live. Now, you need to pick a blog hosting service.
For registering your domain name and blog hosting, I highly recommend Bluehost. It’s officially recommended by WordPress.org.
Bluehost hosts millions of websites and has been working with WordPress since 2005. Users opt for this popular blog hosting service because it’s more reliable and easy to set up when compared with other hosting providers.
Plus, if you use our referral, you’ll get 60% off, and you’ll also be able to register a domain for free!
Exclusive offer for BlogTyrant readers
We have partnered up with Bluehost to get 60% off for our readers! You also get to register a FREE domain for a year which normally costs around $14.99 per year.
Claim this Exclusive Bluehost offerGet Started with Bluehost
Click on the link above, and then once the page is loaded, click on Get Started Now.

Once you’ve clicked, you’ll be on a new page where you can pick a pricing plan. Select the one that suits you best.
Next, you need to type in the domain name you’ve chosen, or you can click on “I’ll create my domain later” if you haven’t decided yet.
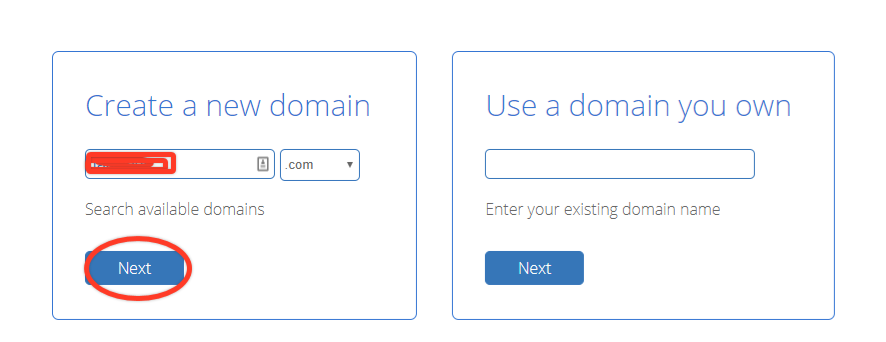
Then, you will be asked to add in your information, starting with self-explanatory account information.
You’ll then be asked to add your package information. This is where you choose how long you want the pricing plan to go for. The best value is the 36 Month Price.

You can also purchase extra add-ons if you like, but that’s entirely up to you. Since you’re just starting out, add-ons aren’t essential, and you can skip them for now.
Next, you’ll have to add your payment information to complete the signup process.
After you’re done, you’ll get an email with your login details to your web hosting control panel. Once you have logged in to your Bluehost account, you can find your WordPress site under the My Sites tabs.
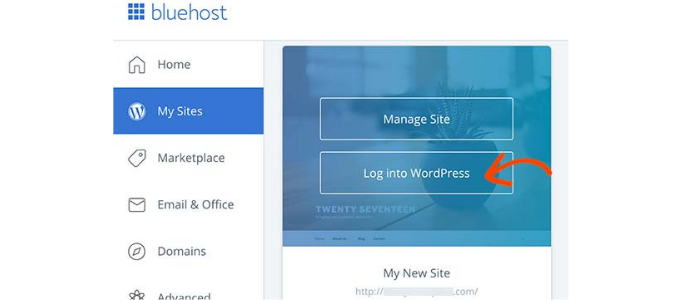
Click on Log into WordPress and enter your credentials. Once you’ve logged in, click on Create Site.
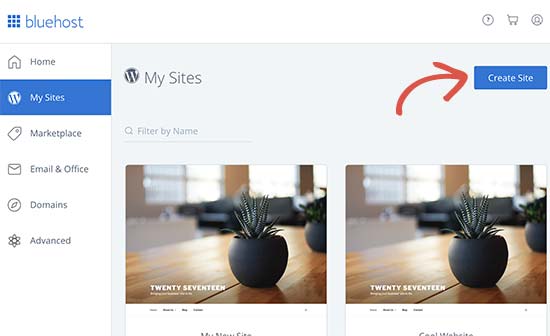
This will launch the WordPress installation process. Installing WordPress on Bluehost is very simple. All you have to do is follow the installation wizard. For more information, check out our guide on how to install WordPress.
Congratulations, your photography blog is now set up!
Design Your Blog
Now, it’s time to make your photography blog look professional.
As I mentioned before, you can use WordPress themes and plugins to design and customize your photography blog easily.
Let’s go over each…
1. Pick a WordPress Theme
WordPress allows you to create your own theme from scratch, but for that, you either need to know how to code or hire someone to do it for you.
This will require you to spend a lot of time and money. The better option would be to use WordPress themes to design your blog.
There are thousands of WordPress themes to choose from. You can either go for the free options, or you can get premium themes with more advanced features.
When you are deciding on which theme to pick, make sure that you go for simplicity. Your readers will love your blog if it has a clean design that puts all of the focus on your photos.
You can also read our guide on how to choose a WordPress theme for more tips.
One of our favorite WordPress themes is Astra. It’s free to use, but you can also upgrade to a premium plan to access advanced options as your blog grows!

And check out our list of the best WordPress themes for blogs for more of our favorites.
Go through these themes and see which one works best for you. Once you’ve decided on which theme to use, install it on your WordPress blog.
To install a WordPress theme, follow these steps:
- Log in to your WordPress dashboard.
- On the left panel, click on Appearance » Themes.
- Click on the Add New button. You’ll be taken to a page where WordPress themes are listed.
- Hover your mouse over the one you like and click on Install.
- After it has been installed, click on the Activate button.
For more information, check out this guide on how to install a WordPress theme.
2. Install Important Plugins
The best part about using WordPress as your blogging platform is its customization. And with WordPress plugins, you can take customization to another level.
There are over 60,000 plugins available in the WordPress library. You can use plugins to create image galleries, contact forms, forums, and so much more.
Before I list all the essential plugins you should have on your blog, here’s a quick tutorial on how to install WordPress plugins.
- Click on Plugins on the left side of your WordPress dashboard.
- Search for the plugin you want to install.
- Click on the Install button next to the plugin you want.
- Once it’s installed, click on Activate to start using your new plugin.
For more detailed information, here’s a guide to installing WordPress plugins.
Now, let’s look at some essential plugins that will help you optimize your blog and improve its overall performance.
1. All in One SEO (AIOSEO)
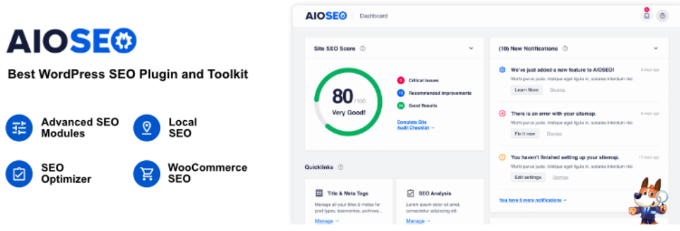
All in One SEO is the best SEO plugin for WordPress. It optimizes your site for search engines like Google, which will help you boost your search engine rankings and grow your blog traffic.
This SEO tool will analyze every page and post on your blog and give it an SEO score. Plus, it will give you an easy-to-follow checklist of actions you can take to improve your ranking based on your focus keyword.
All in One SEO is free to use. But you can also upgrade to the premium version to unlock more powerful features.
2. MonsterInsights
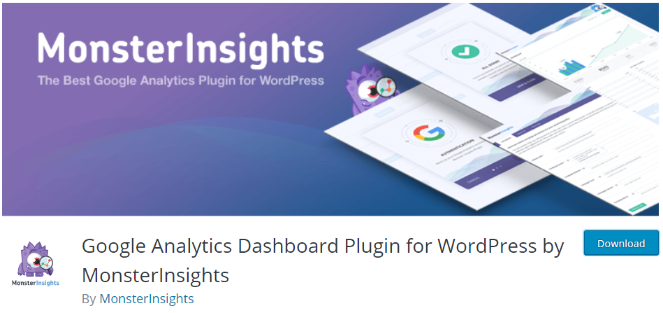
MonsterInsights helps you install and configure Google Analytics on your WordPress blog easily.
With analytics in your WordPress dashboard, you can see which content performs best and give your readers more of what they are looking for.
You can also discover more about your readers and their behavior on your site.
For example, you can see how people found your site, which pages they visited, what they clicked and much more. You can use these powerful insights to tweak your website design for better results.
You can use MonsterInsights for free or get the premium version to unlock advanced features.
3. WPForms
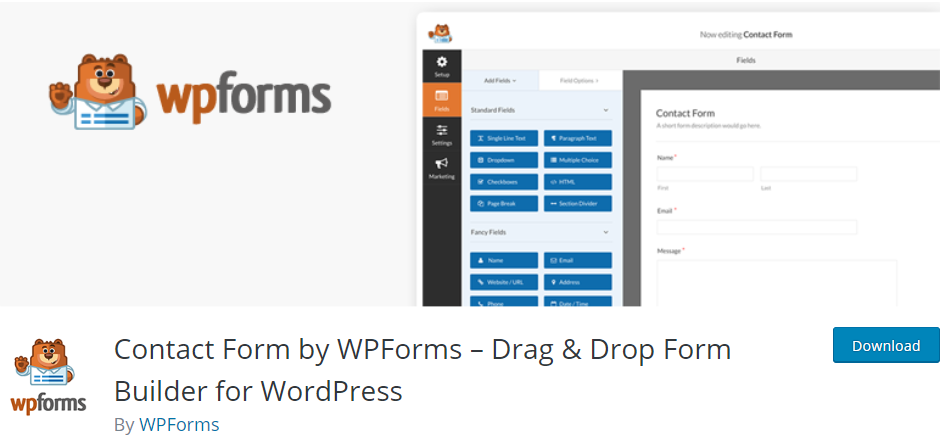
With WPForms, you can create a contact form for your blog. A contact form allows your readers or potential photography clients to get in touch with you.
WPForms is free and the drag and drop builder makes it easy to customize your contact form. Check out our tutorial on creating a simple contact form.
And if you upgrade to the pro version of WPForms, you can also create surveys and polls, allow users to submit their own photos through forms, collect payments, and much more.
4. Sucuri

Sucuri is a popular WordPress security plugin that helps you beef up your blog’s security so that you never get hacked.
This plugin scans your blog regularly for vulnerabilities and notifies you if there is a breach. And the best part is that it’s completely free.
5. UpdraftPlus

UpdraftPlus is a WordPress plugin that schedules regular backups of your website in case something goes wrong.
Sometimes, because of some error, you might lose your data, and you’ll be back to square one! To prevent this, you can use UpdraftPlus so that you never have to worry about losing your hard work.
6. WP Super Cache
WP Super Cache helps speed up your blog by making it load faster for your readers. Slow-loading blogs tend to put your readers off, and they might leave your site rather than wait for it to load.
To prevent this, install WP Super Cache so that you never have to worry about losing your readers again.
These were some of the essential WordPress plugins you need to install to get your photography blog running more effectively.
You can find more awesome plugins in our list of the best plugins for WordPress.
Start Creating Content
Now that your blog is live and you’ve installed the right plugins and themes, it’s time to get to the good stuff.
You need to start publishing content for your readers—content that is relevant and interesting, something that resonates with your readers.
You cannot try to be everything to everyone. When it comes to blogging, that’s the fastest route to failure.
That’s why it’s best to choose a niche for your photography blog and stick to it.
Choosing a niche for your photography blog will make it easier to attract a loyal audience.
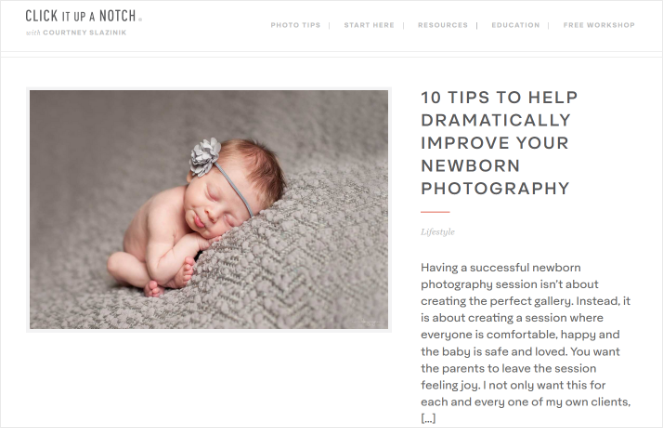
For example, the blog Click It Up a Notch focuses on family photography and creates content all about that type of photography:
So, take the time right now to brainstorm a few ideas for your photography blog’s niche.
To help you figure out your blog niche, answer these questions:
- What do you want to write blog posts about? What type of images do you want to share?
- Who is your target audience?
- What is the outcome you hope to achieve with your blog?
You may have diverse topic ideas but try to group them together to come up with a niche for your blog. You’ll have an easier time narrowing the focus of your photography website and making random topics come together in a way that appeals to your readers.
Here are some photography niche ideas to get you started:
- Film photography blog
- Boudoir photography blog
- Travel photography blog
- Food photography blog
- Fashion photography blog
- Street photography blog
- Pet photography blog
- Nature photography
- Wedding photography
And more.
When you choose a niche, try to stick with it and don’t deviate from it, or else you might lose your reputation with your audience.
For more tips on creating awesome content, check out these posts:
- How to write a good blog post
- The ultimate blog post checklist
- 87 blog post ideas that will never fail you
Monetize Your Blog
I’m pretty sure that you didn’t put all this time and effort just to run a casual photography blog. You’re out there to make money with something you love.
After you’ve taken your blog live, monetizing your blog is the next logical step.
There are countless ways you can monetize your blog. For example, you can earn money from display ads on your blog with Google AdSense.
It does bring in money if you’ve got a lot of traffic, but the ads can be distracting for readers.
Our favorite way of monetizing a blog is through affiliate marketing.
Affiliate marketing is when companies incentivize bloggers and publishers to recommend their products by offering them a commission for every sale.
You’re running a photography blog which means you already have a lot of photography gear you use. So, you can promote the exact camera you use on your blog and when visitors click on your affiliate link and buy it, you get a commission.
You can use ShareASale to find relevant affiliate products that offer good commissions.

And of course, if you’re a photographer, you might want to sell prints of your work.
Here’s how photographer and digital artist Alice Zilberberg does it:
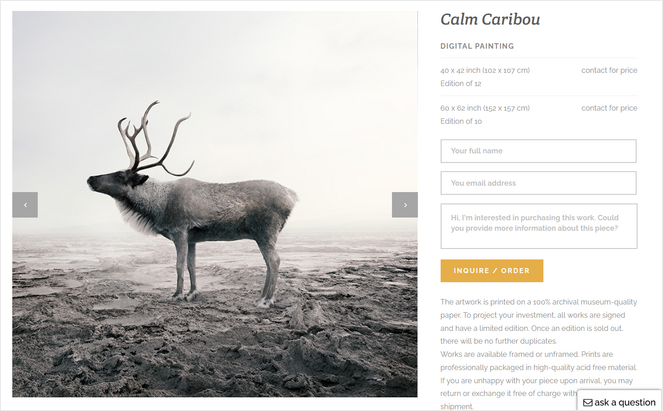
She adds a contact form that you can create with WPForms so visitors can inquire about the price of the artwork if they’re interested in owning it.
Or, you can create a full online store where visitors can add prints and other merchandise to their cart and pay for it at checkout like Anette Mossbacher does:
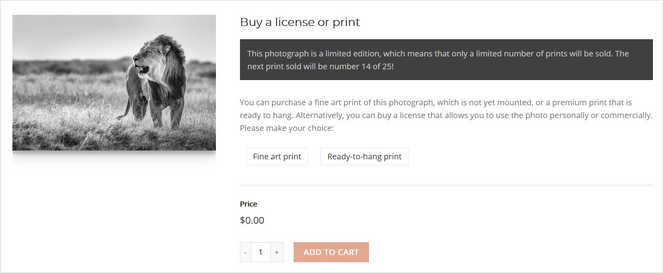
With WordPress, you can easily add an online store to your blog. Check out this tutorial on starting an online store for tips on how to set it up.
And there are plenty of other ways to monetize your photography blog. Read this guide on how to make your blog more profitable for more smart ideas.
Grow Your Photography Blog
Your blog is now live and looking good. You’ve also started producing excellent content and photography tips for your readers and set up some monetization strategies. Now, let’s take a look at how to grow your blog and attract more people.
If you really want to make the cut in the world of photography blogs, you will have to stay on your toes. You’ll constantly have to promote your blog to attract new readers and customers.
The more traffic your blog gets, the more money you’ll be able to make, so in this section, I will share some of our tried and tested blog promotion tips that are sure to bring in a lot of traffic for your new blog.
1. Promote Through Social Media
You can’t run a photography blog without a social media platform. Almost every photography blogger has an active Instagram account.
Instagram’s audience loves photography content, and as a blogger, you need to focus on Instagram if you want more traffic to your blog.
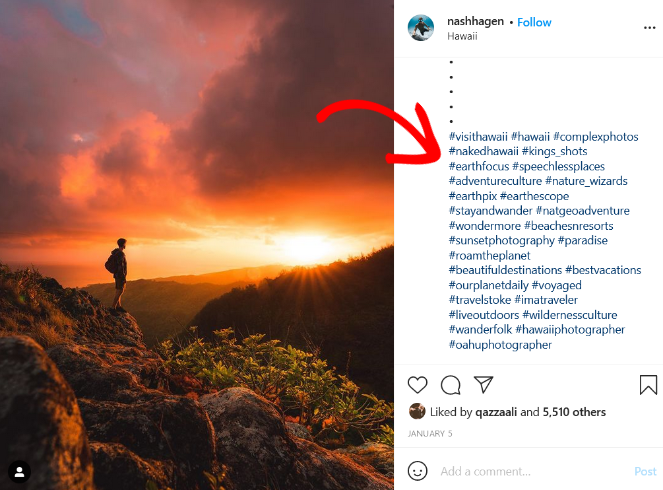
All you need to do is post some beautiful pictures on your Instagram profile and use relevant hashtags to attract your target audience to your post.
For example, this post from travel photographer Nash Hagen includes hashtags like #VisitHawaii, #Hawaii, and #BestVacations to reach people that are interested in seeing photos of Hawaii.
It’s important to link to your blog in your bio to encourage Instagram users to visit your blog and drive traffic to your website.
You can also convert your blog traffic into Instagram followers with the help of Instagram Feed Pro by Smash Balloon.
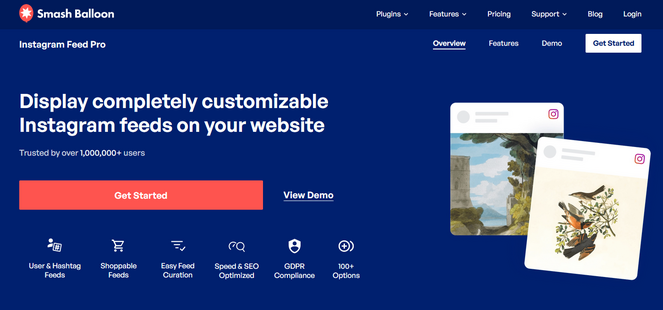
Smash Balloon lets you embed your Instagram feed on your blog so that it gets maximum visibility.
You can display user feeds, hashtag feeds, tagged feeds, Instagram Stories, Instagram TV (IGTV) videos, and more. Or, you can display a mixed feed of different feed types.
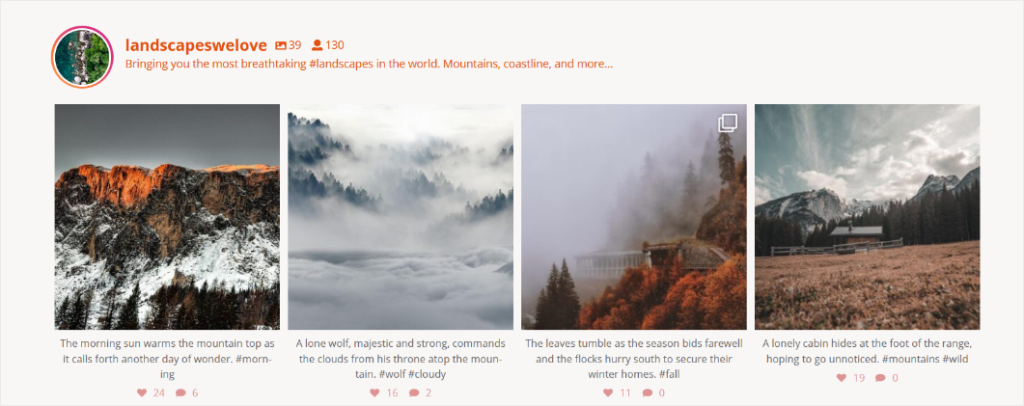
Adding your Instagram feed to your blog will help you get more followers and improve engagement on your blog.
Check out our Smash Balloon review for more information.
And if you’re on a budget, you can try out the free version.
2. Start an Email List
Starting an email list is another excellent way to get more visitors to your website. With email marketing, you can contact your most loyal readers directly to promote your latest blog posts, products, promotions, and more.
But how do you get subscribers?
Don’t worry, growing your email list is easy if you have the right tools and the right ideas.
To grow your email list fast, I recommend that you use OptinMonster.

With OptinMonster, you can easily create eye-catching optin campaigns to display on your blog.
You can create lightbox popups, floating bars, scroll boxes, and much more to grab the attention of website visitors.
To make your optin more effective, show visitors an exciting offer in the popup, like a free ebook or a discount. Most people will be willing to give your their email address if they get a free gift in return.
Photography blog Cole’s Classroom created this Yes/No popup to grow its email list:
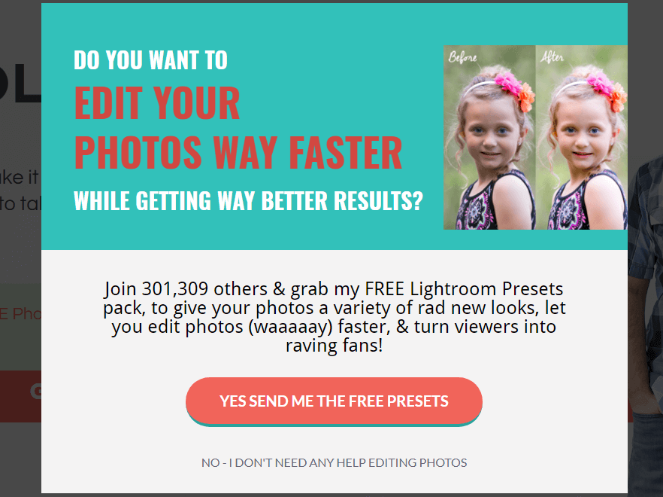
It offers a free Lightroom Presets pack to visitors in exchange for their email addresses.
With this single optin, Cole’s Classroom was able to convert 7% of visitors and increase sales by $55,494!
For more tips, check out this post on how to grow your email list.
3. Run a Giveaway
Creating an online giveaway is an excellent way to drive more traffic to your blog, get more email subscribers, and increase social engagement.
For running a giveaway on your blog, I highly recommend RafflePress.
RafflePress has a drag and drop builder that makes it super easy to create a custom giveaway. Plus, it has verified bonus actions that will help you reach your goals.
For example, you can reward users with extra giveaway entries for performing specific actions like sharing the giveaway on social media or signing up for your email newsletter.
There’s even a Submit an Image action which is perfect for running a photo contest.
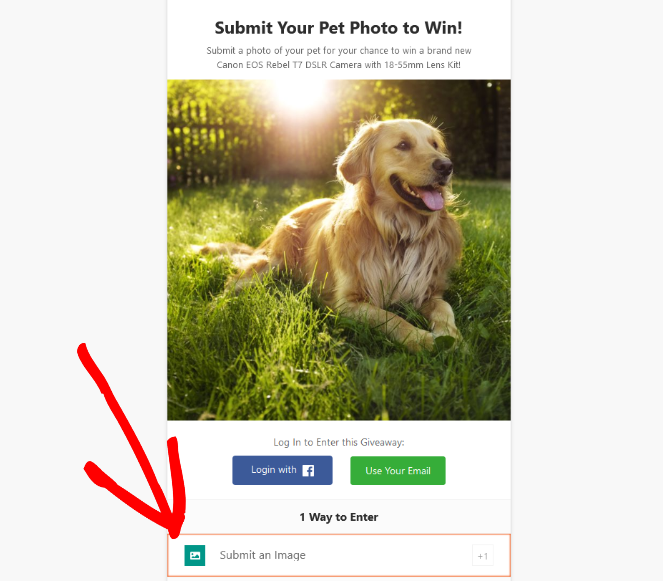
Running a photography contest with RafflePress is a sure way to bring loads of traffic and engagement to your blog.
You can check RafflePress’ guide on how to create a photo contest for more information.
4. Leverage SEO
SEO is essential if you want to drive traffic to your blog. Focus on writing search engine optimized content that will rank higher in Google. I emphasize that you always write for your readers but also keep search engines in mind!
If you optimize your content for search engines, you will bring in free traffic to your blog.
Focus on finding the right keywords and include them in your content.
I’ve covered various topics related to SEO. You should check them out for more details:
5. Create a Facebook Group
Creating a Facebook Group is a great way to build a dedicated community around your photography blog.
For example, WPBeginner runs a Facebook Group called WPBeginner Engage. It’s one of the best WordPress groups on Facebook and has a huge following and lots of engagement.

You could follow the same strategy and create a group that talks about photography lessons, equipment, and other general discussions about photography.
You can share your own blog posts in the group to send traffic back to your blog. This will not only increase engagement and traffic on your blog but also on your Facebook Group.
You can also use this group to promote offers and promotions to increase your monthly earnings.
6. Start a Membership Site
Having a membership blog gives your readers a sense of exclusivity. They feel like they are a part of an elite group where you’ve promised to share your best work.
It’s also another amazing way to monetize your blog. You can charge users a monthly subscription fee to access premium content.
Cole’s Classroom is a good example of a photography membership site:

Users pay a small fee to access photography courses, video lessons, group coaching, and more.
To create a membership program on your blog, I highly recommend MemberPress.
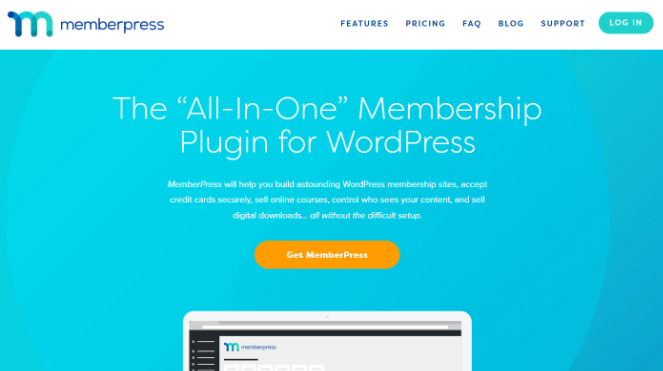
MemberPress is easy to set up. All you have to do is install the plugin, add your payment gateway details, and create or select which content and products are only available for members.
MemberPress also makes it easy to create and sell online photography courses for your readers. They have a special Classroom Mode setting, so you won’t have to design the course from scratch. MemberPress takes care of all the technical details and makes it look professional, so your photography blog or website may well grow into a fully-fledged photography business!
Key Takeaways to Help You Start a Photography Blog
- Inspiration from Successful Blogs: Light Stalking, 1000 Words, and The Wandering Lens are great examples of photography blogs that cater to beginners, tell unique stories through images, and blend travel and photography, respectively.
- Platform and Tools: Opt for a self-hosted blogging platform like WordPress.org to enjoy customization, ownership of content, and monetization capabilities. Avoid free platforms that limit these aspects to create a photo blog.
- Domain and Hosting: Carefully pick a domain name for your blog that’s memorable and broad enough to allow future expansion. Use services like Nameboy for suggestions and register with a reliable registrar like Bluehost, which offers discounts and a free domain through certain referrals to give best value for money.
- Design with Themes and Plugins: Use WordPress themes for a professional look without coding to start a photo blog. Essential plugins like All in One SEO, MonsterInsights, WPForms, Sucuri, UpdraftPlus, and WP Super Cache enhance SEO, security, functionality, and site speed.
- Content Creation: Stick to a photography blog niche to attract a loyal audience and create relevant, engaging content. Use blog content to showcase your photography work, share photography techniques and tips, and tell stories.
- Making Money With Your Photography Blog: Beyond traditional ads, consider affiliate marketing, selling prints, or creating an online store. Affiliate networks like ShareASale and e-commerce plugins for WordPress facilitate these efforts.
- Growing Your Blog: Share your blog on social media, especially Instagram, to drive traffic. Grow an email list and consider giveaways to engage your audience further. Use SEO best practices to increase visibility and explore unique avenues like Facebook Groups, teaching photography online courses or membership sites for building photography communities and additional revenue streams from your successful photography blog.
How to Start a Photography Blog – Final Thoughts
That’s it!
You now know how to create a photography blog, and I hope these tips help you grow your photography blog into a huge success!
If you liked this article, you might want to check out our guide on how to write blogs that convert.
And don’t forget to sign up for our email newsletter so you can get helpful content like this sent right to your inbox!


Outstanding blog man