
D o you want to know how to install Google Analytics on your WordPress blog? Google Analytics is the most popular web analytics service, but most bloggers find it difficult to install on their site.
Adding Google Analytics to WordPress lets you track and collect information about your visitors. You’ll be able to discover how they find your site, how long they stay there, which pages they visit, and which pages they like most.
In this article, we’ll show you how to install Google Analytics on your WordPress blog using three different methods.
In This Guide:
Let’s get started!
What is Google Analytics?
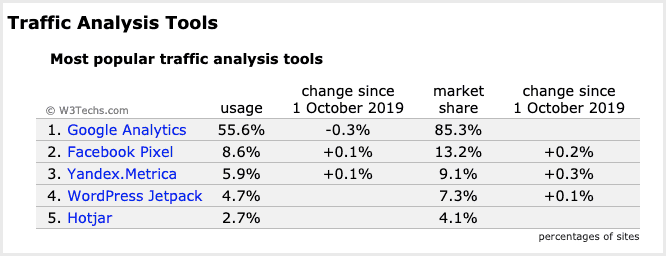
Google Analytics is a free web analytics service that tracks and reports website traffic and user behavior. It’s the most popular traffic analysis tool used on websites:
Any type of website can use Google Analytics, including:
- Blogs
- eCommerce Sites
- Small Businesses
- And Much More
Why You Need Google Analytics
Once you start a blog, you’ll want to get more traffic and email subscribers. And to help you achieve that, you need to know what’s working and what isn’t.
Google Analytics allows you to get detailed information about your visitors, such as how many have visited your site, how long they stayed, and what pages they viewed, so that you can make smarter decisions.
Here’s a taste of what you can learn from the data:
- Who visits your website? – You can check where your visitors are located and whether they use a computer or mobile to access your site.
For example, if you find that most of your visitors are located in India and use a mobile phone to read your blog, then your site needs to be optimized for mobile screens, and your content targeted to that audience.
- What do your visitors do? – You can discover which blog posts and pages they read most, how many pages they read each visit, and how long they stay on your site.

For example, if a page has a high bounce rate (that’s people leaving after just one page), then you can improve the content to encourage people to stay longer and visit related pages.
- When do they visit? – Check precisely when people visit your site by the hour, day, week, or month. For example, if you’re based in the UK, but most of your visitors come at 4 pm EST, then you can adjust your schedule to publish new content at that time of day.
- How do they find your website? – Google Analytics also tracks where your visitors come from. For example, did they find you in a search engine result, did they come via a social media post, or did they click a link in an email newsletter?
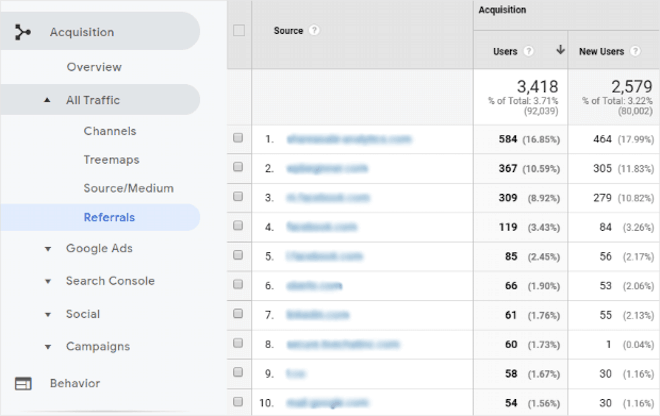
You can get an overall picture of these sources, and you can also check at the individual page level. Armed with this data, you might decide to increase your social media presence to start promoting your content more. Or you might decide you need to optimize pages for search results to increase organic traffic.
- How do they interact with your content? – You can also track how visitors interact with your content. For example, you can see the path they followed from one page to another. Maybe they landed on your homepage and clicked the link to read your latest blog post. And if you define goals and events, like visitors signing up to your email newsletter or people contacting you about service, you can also track those.
As you can see, Google Analytics provides the data you need to make informed decisions and eliminate the guesswork.
How to Sign up for Google Analytics
Before you install Google Analytics on your WordPress website, you need to sign up for a Google Analytics account.
If you already have an account, you can skip to the next section.
If you don’t have an account, then follow these steps:
Step 1: Log in to Google
The first thing you’ll need to do is visit the Google Analytics website and log in by clicking Sign in to Analytics or sign up for an account by clicking Start for free. You can either use an existing account or create a new one.

Step 2: Sign Up For Google Analytics
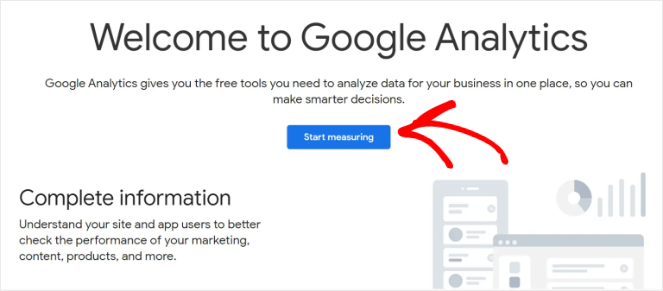
Once you’ve logged in to your Google account, click on the Start measuring button to set up Google Analytics.
Next, you’ll need to enter the settings for your website, including:
- The account name (this doesn’t have to be your website name)
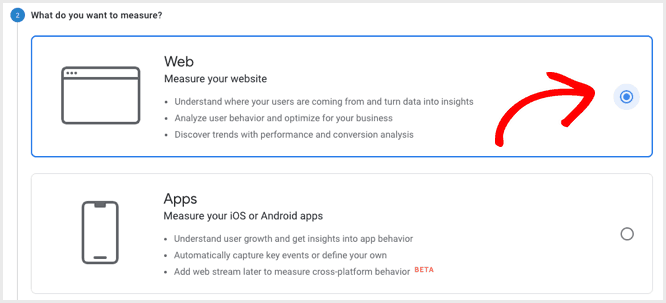
- What you want to measure: click web
- Property details: enter your website name, time zone, and currency:
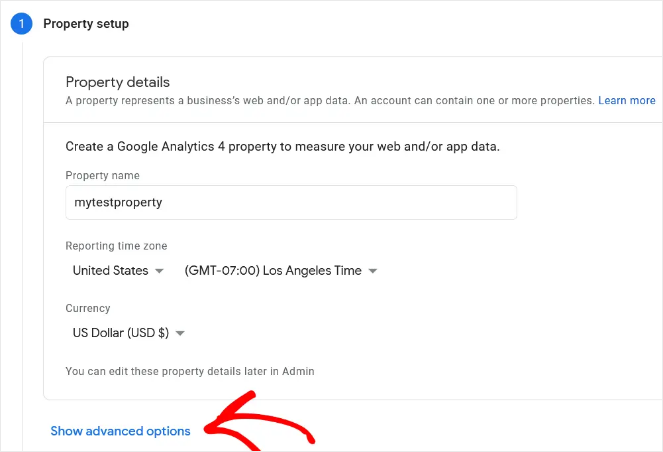
Once you’ve entered your property details, click on Show advanced options.
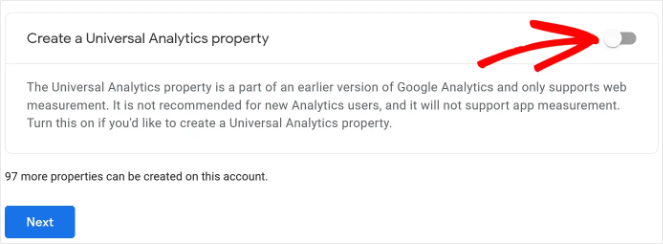
Then, enable the Create a Universal Analytics property option:
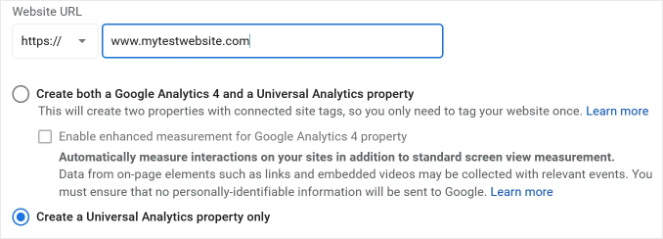
Next, enter the URL of your website and be sure to select the Create a Universal Analytics property only option. Otherwise, you may face issues connecting to other tracking platforms like MonsterInsights, which we’ll show you how to do later in this tutorial.
Click Next when you’re done and continue to fill out your business information such as your industry and the size of your business.
Note: You’ll also have to accept the Terms of Service Agreement.
Finally, you’ll get your Tracking ID and Website Tracking Script:
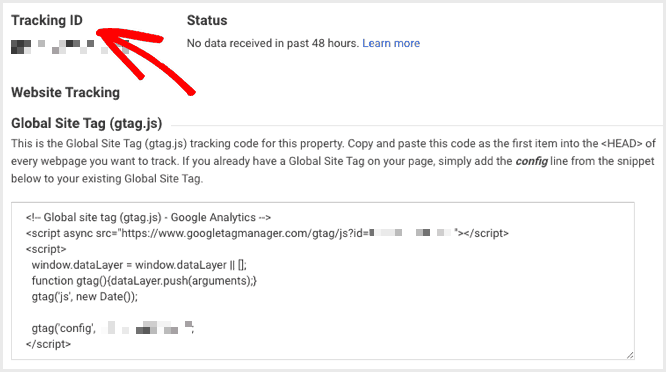
Note: You’ll need these in the next section, so make a copy of them for later.
Now, you’re ready to add Google Analytics to WordPress.
3 Ways to Add Google Analytics in WordPress
There are several ways to set up Google Analytics in WordPress. In this guide, we’ll show you 3 methods, starting with the easiest and ending with the most difficult.
1. How to Install Google Analytics Using MonsterInsights (Recommended)
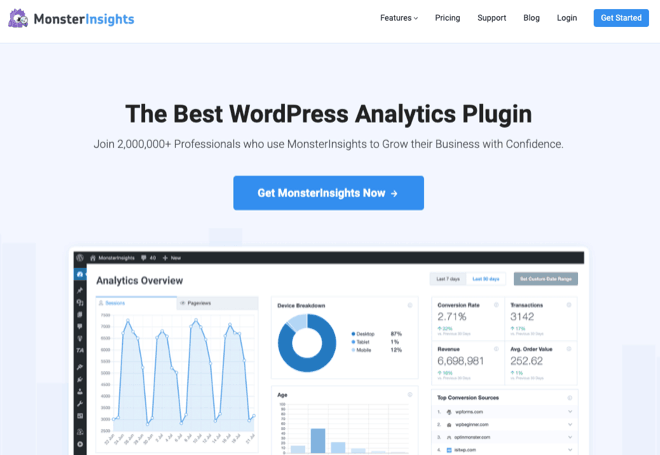
MonsterInsights is the best Google Analytics Plugin for WordPress, used on more than 2 million websites.
The MonsterInsights plugin makes it easy to connect Google Analytics to your WordPress blog. But the best part about using MonsterInsights is that you can view your Google Analytics reports right inside your WordPress dashboard and quickly see all the insights you need.
To get started, you’ll need to download, install, and activate MonsterInsights.
Note: If you need help, follow our step-by-step guide on how to install a plugin in WordPress.
Once that’s done, you’ll see a welcome screen:

Click on the ‘Launch the Wizard!’ button and follow the steps.
First, select the category that best describes your site and then click the Save and Continue button.
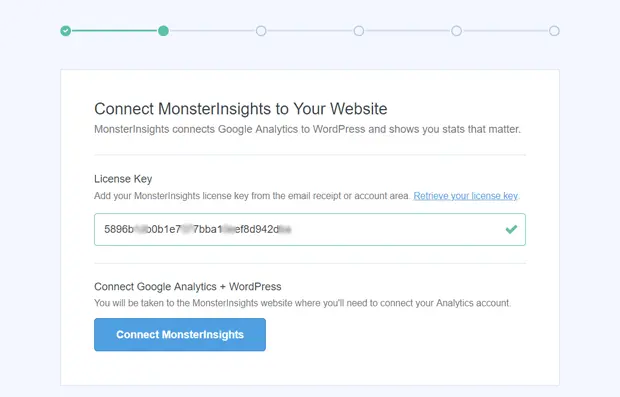
Next, you’ll need to enter your MonsterInsights license key:
Note: You can find your MonsterInsights license key in your email receipt or account area.
Once you’ve entered your license key, MonsterInsights quickly verifies the details. Then you can click on the Connect MonsterInsights button to connect your Google Analytics.
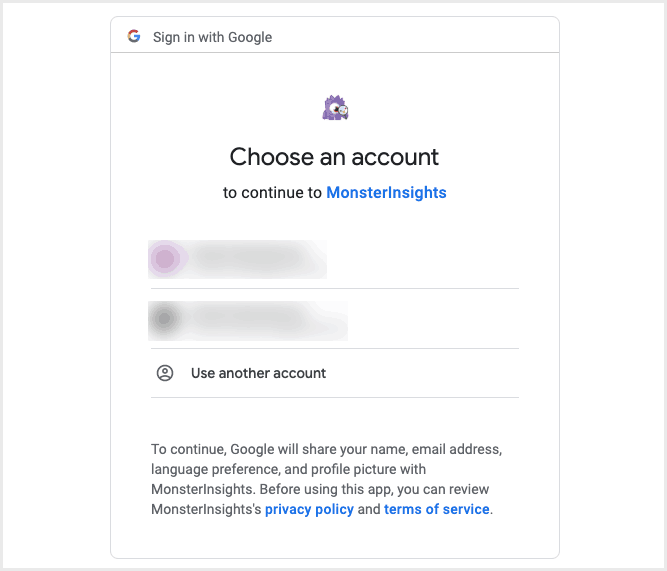
First, you’ll see an option to connect your Google Account with your MonsterInsights account. Select the account you use for Google Analytics to continue authentication:
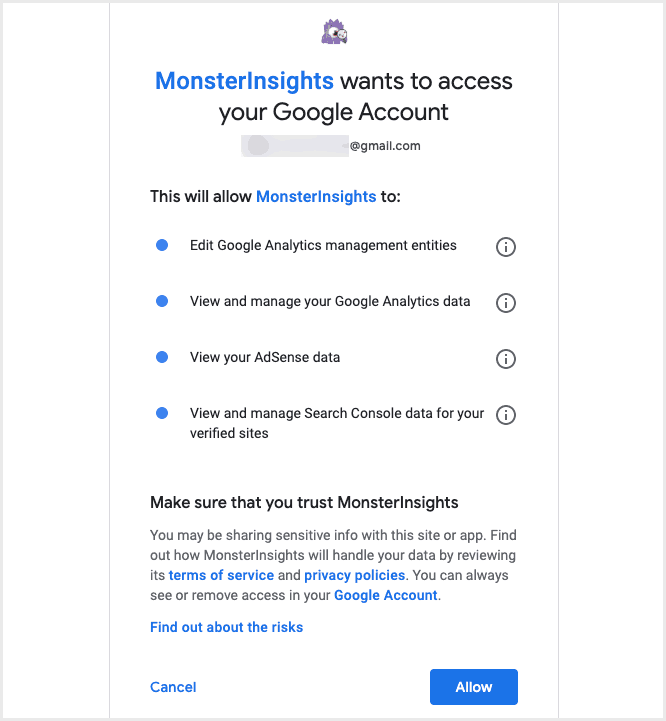
Then, you’ll need to click the Allow button so that MonsterInsights can access your Google Account:
The next step is to connect Google Analytics to your website:
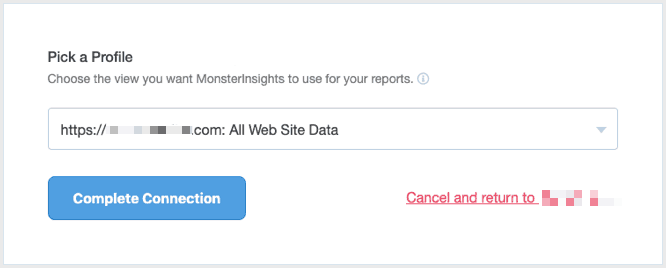
Note: If you have multiple websites linked to your Google Analytics account, then you’ll need to choose the right website property from the dropdown.
Choose your profile, and then click the Complete Connection button.
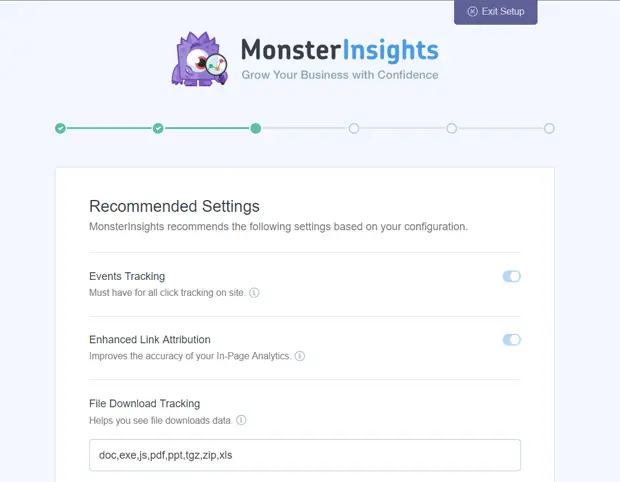
Once that’s authenticated, you’ll see a list of recommended settings based on your earlier selection:
- Events Tracking – provides click tracking on your site.
- Enhanced Link Attribution – improves the accuracy of your in-page analytics.
- File Download Tracking – helps you track file downloads of popular formats (doc,exe,js,pdf,ppt,tgz,zip,xls).
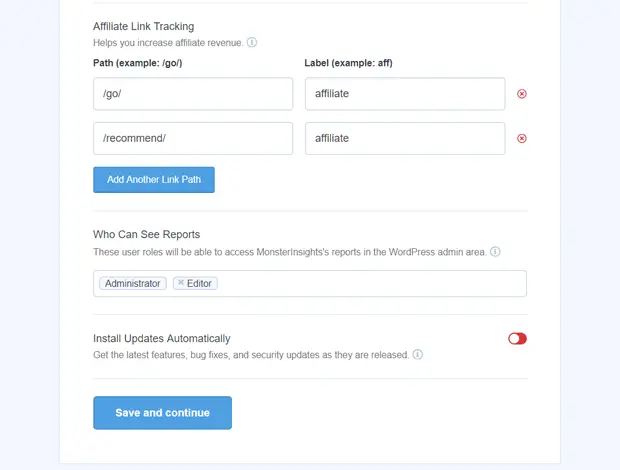
As you scroll down, you’ll see more settings:
- Affiliate Link Tracking – lets you add more affiliate link paths.
- Who Can See Reports – lets you choose who can see the MonsterInsights reports in the WordPress dashboard.
- Install Updates Automatically – gives you the option to install plugin updates automatically.
Review the settings, and then click the Save and continue button.
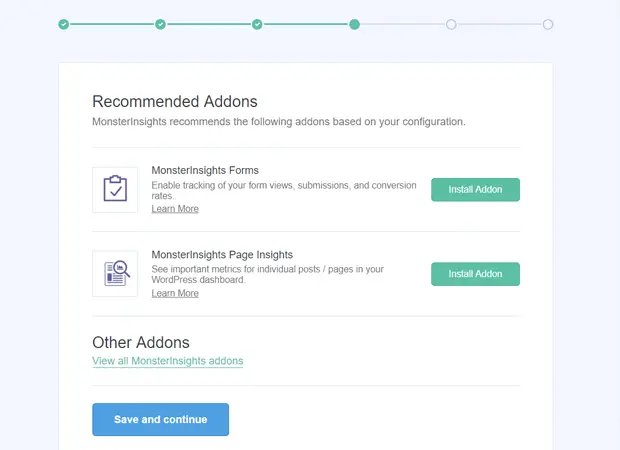
On the next screen, you can see the Addons already activated based on your initial selection, plus a couple more recommendations:
Select which Addons you require, then click on the Save and continue button.
That’s it. You’re all set:
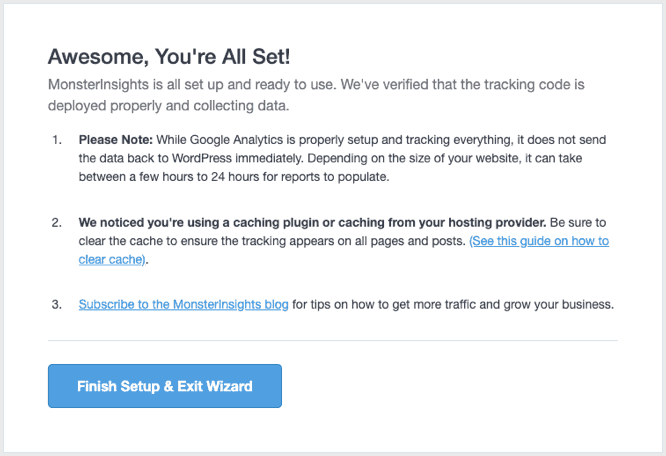
Click on the Finish Setup & Exit Wizard button.
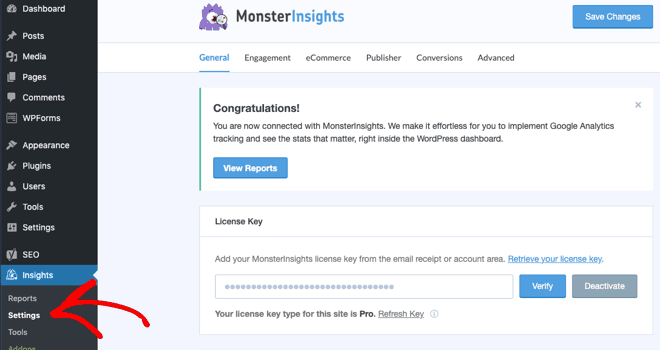
Note: You can review and update your settings at any time.
You can also set up dual tracking if you have both a Universal Analytics property and a Google Analytics 4 (GA4) property. Setting up dual tracking with MonsterInsights will let you use all of your historical data from Universal Analytics while collecting additional data with GA4.
To set up dual tracking, go to the main Settings page. Then, scroll down to Google Authentication and find the Dual Tracking Profile box.
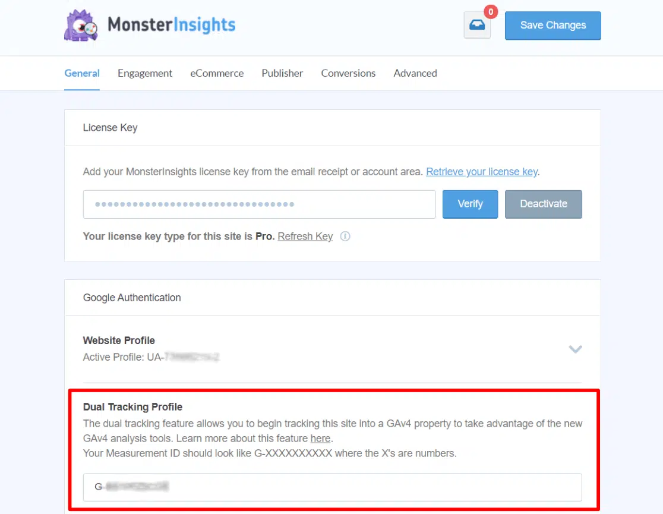
Here, you can add either your Universal Analytics Tracking ID or your GA4 Measurement ID, whichever one you didn’t authenticate in the setup wizard.
It will take a few hours for Google Analytics to start collecting data. But after that, you’ll be able to view the Insights right inside your WordPress dashboard:
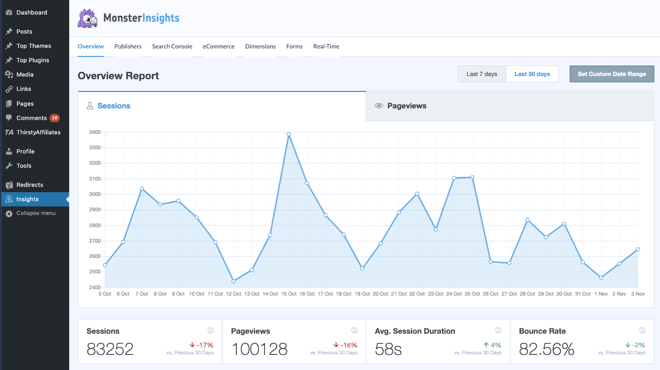
For example, MonsterInsights lets you see:
- Top landing pages: Which landing pages are most popular on your site.
- Link and button click tracking: Which links and buttons are getting the most clicks.
- Search console report: Which keywords people are using to come to your site.
- Forms tracking: Which forms are getting the most impressions and conversions.
You can view all the other reports by clicking on the tabs at the top of the screen.
2. How to Install Google Analytics Using the Insert Headers and Footers Plugin

The Insert Headers and Footers plugin lets you insert extra scripts like Google Analytics, Custom CSS, Facebook Pixel, and more to your WordPress site header and footer without having to edit your theme files.
Insert Headers and Footers also makes it easy to connect Google Analytics to WordPress. But this method is not as good as MonsterInsights because you can’t view the Google Analytics data in your WordPress dashboard. You’ll need to check data inside Google Analytics, and that can be a little overwhelming until you find your way around.
First, you need to install and activate the Insert Headers and Footers plugin.
Note: For more details, see our step by step guide on how to install a WordPress plugin.
Now you need to find and copy your Google Analytics Tracking Code. If you didn’t make a copy earlier when you created your Google Analytics account, you can find the script in Google Analytics by navigating to Admin > Property > Tracking Code:
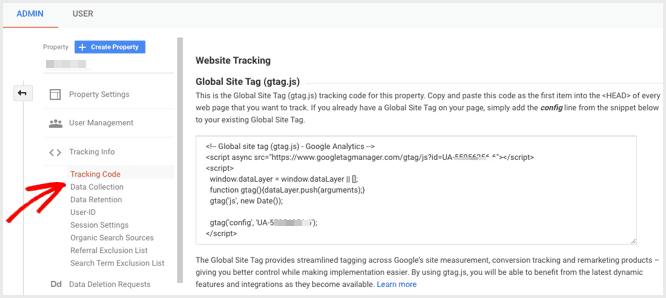
Once you’ve copied your Google Analytics Website Tracking Code, paste it into the Header section of the plugin settings:
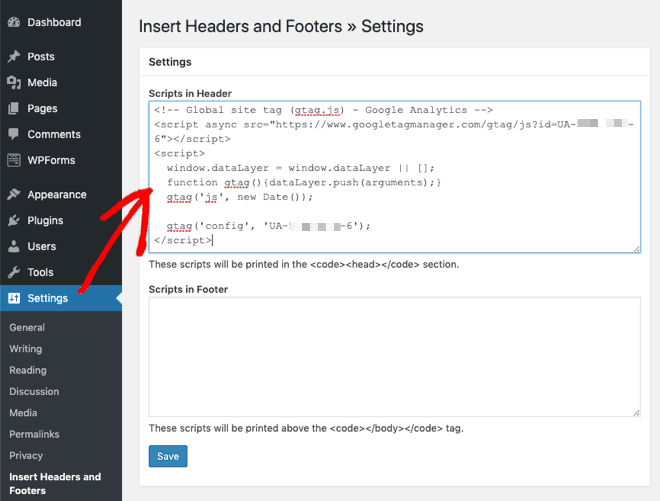
Save your settings by clicking the Save button.
And that’s it. You’ve completed the second method and connected Google Analytics to your WordPress blog!
3. How to Install Google Analytics in Your WordPress Theme (Advanced)
The third method is the most advanced and trickiest of the three options in this guide.
Installing the Google Analytics Tracking Code directly in your WordPress theme header carries the most risk. Plus, you’ll need to feel comfortable editing code.
You’ll be making direct edits to your theme in the WordPress dashboard, so there’s a risk that you could break your site in the process. Therefore you’ll need to take a few precautionary steps before you begin editing.
Step 1: Use a file manager to create a copy of your theme with a new name in case you need to revert to the original.
For more details, see our guide on the WordPress file and directory structure.
Step 2: Create a child theme so you can change small aspects of your site’s appearance yet still preserve your theme’s look and functionality. Every time there’s an update to your WordPress theme, you’ll lose any changes you made in the Theme Editor. But if you make changes to your Child Theme, they’ll be safe from the main theme updates.
For more details, see our guide on how to create a child theme in WordPress.
With those steps in place, you can go ahead and make your changes.
From your WordPress dashboard, go to Appearance > Theme Editor:

Make sure you’ve selected the correct theme or child theme, and then on the right-hand side, scroll down the menu and click on Theme Header:
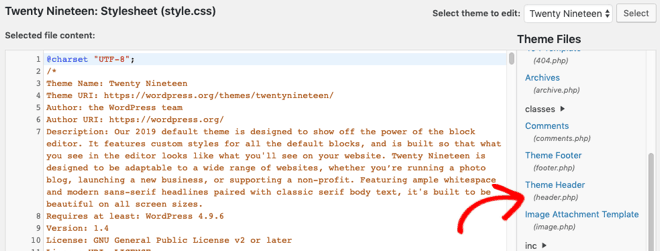
Now in the main panel, copy and paste the Tracking Code from Google Analytics before the closing </head> bracket:
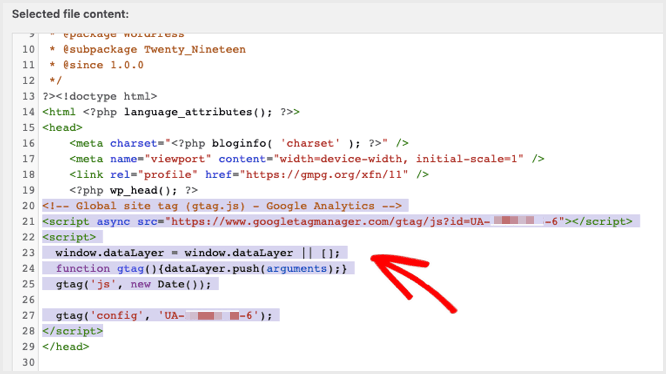
Now, click the Update File button at the bottom of the page to save your changes.
And that’s it! You’ve completed the third method of installing Google Analytics in WordPress.
Final Thoughts
That wraps up our tutorial on how to add Google Analytics to WordPress.
We recommend using MonsterInsights as it installs Google Analytics correctly and brings all the insights to your WordPress dashboard.
If you’re happy to analyze your data in the Google Analytics platform, then the Insert Headers and Footers plugin makes it easy and safe to install Google Analytics.
Both of the plugin methods mean you won’t have to edit any code or risk losing functionality.
But if you prefer not to use a plugin and you’re super confident with coding, then you can manually add the Google Analytics Tracking Code to your Child Theme.
The most important thing is to install Google Analytics and benefit from the data insights it provides so you can grow your blog. And now you have three proven ways of doing so.
Let us know your thoughts or questions in the comments below.
If you liked this tutorial and want to learn more about how to use Google Analytics, check out our guide on how to see your analytics in WordPress.



great! it’s useful for me because of I m a software developer and also a digital marketer so this information is very important for me to thank you
Thanks, Shraddha, glad you found this useful!
Hey David,
For blogging success, it’s essential to know our audience. It’s also essential to know the return of our blogging efforts. And Google analytics helps a lot with these.
Every blog should have Google analytics installed. This post will surely help with this.
Thanks for sharing this nice post.
Thanks, Liton!
You’re welcome.
Thank you for this. I finally got Google Analytics installed correctly.
Yay! Well done, Lisa! Which installation method did you use?
nice post keep posting thanks for share with us.
Thanks, you’re welcome!
wonderful step by step guide to install google analytics on WordPress, very informative