T he money's in the list… all bloggers have heard this saying before. But how much money can you make from your email list?
There’s no limit but just how much totally depends on you. The more focused you’re on different aspects of list building, the more successful you get.
In this article, I’ll explain one of those important aspects of a successful email list – creating an irresistible email newsletter.
I wrote this step-by-step guide with beginner level users in mind. Whether you’re an absolute newbie or just in need of a refresher, you’ll find this guide helpful.
In This Guide:
What Is an Email Newsletter and Why Do You Need It?
An email newsletter is a type of email that contains valuable content, such as recent blog posts, pillar articles, email course, etc., which is sent to your subscriber list.
Sending email newsletters to your subscriber list is a great way build a long-lasting relationship with your subscribers. With each newsletter, you get your message straight into the inbox of the people you want to see it.
A few benefits of email newsletters are:
- Increase repeat visits to your blog
- Build a loyal following
- Increase sales
Ready to send your own email newsletters? Let’s get started.
How to Create an Email Newsletter
Let’s take a look at how to make an email newsletter, step by step.
Step 1: Choose an Email Service Provider
Not every email service provider is created equal. Just because a provider is popular doesn’t always mean that it’s the best solution for your blog.
It’s easy to get overwhelmed with different email clients out there.
I recommend Constant Contact, one of the best email marketing service providers for beginners.
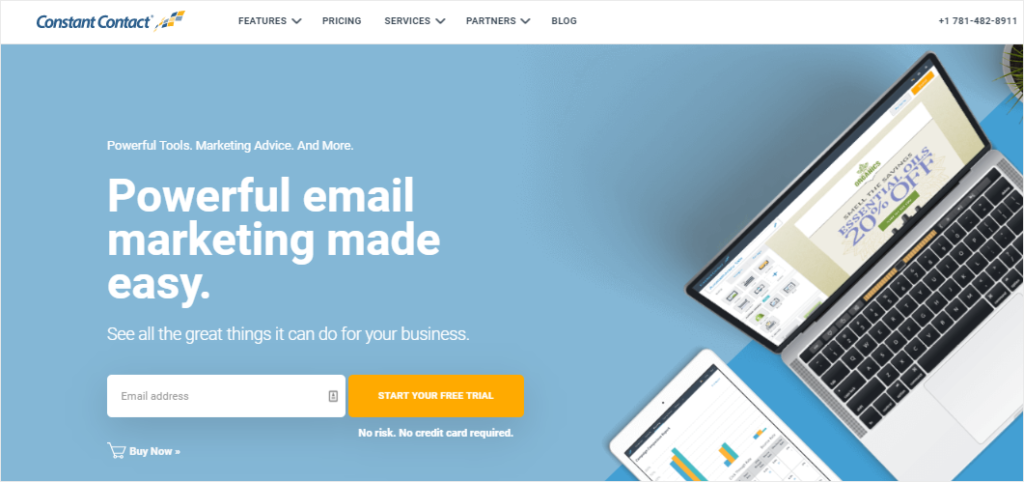
One of the best things I like about Constant Contact is that when you set up your account, you’ll be asked to choose your industry and enter your previous experience with email marketing. Based on your prior experience, you’ll get personalized content and promotion ideas to help you level up your email marketing.
The pricing for Constant Contact starts at $20/month. It’s well worth it not only for all the advanced features they offer, but also for their world-class customer support.
If you’re looking for an alternative, you can check out Sendinblue.
Sendinblue is an email and SMS marketing tool built with simplicity in mind.
Unlike its competitors, Sendinblue charges you based on the number of emails you send rather than the number of contacts in your lists.
With its free email plan, you can send 300 emails per day.
Step 2: Create an Email List
An email list is a collection of email addresses that you collect from your blog visitors. After they subscribe to your newsletter, you can send them emails and build an engaging relationship with them.
To create an email list, log into your Constant Contact dashboard and click Contacts on the top menu.
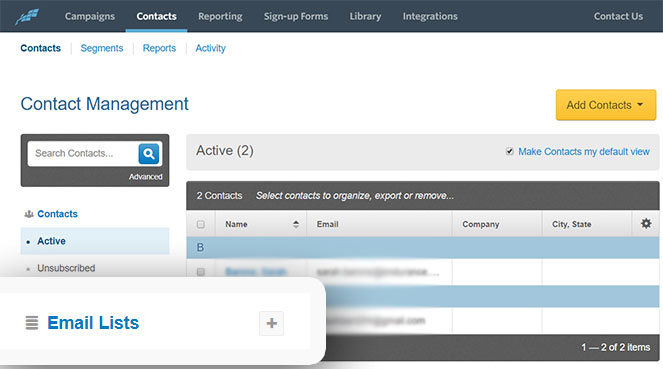
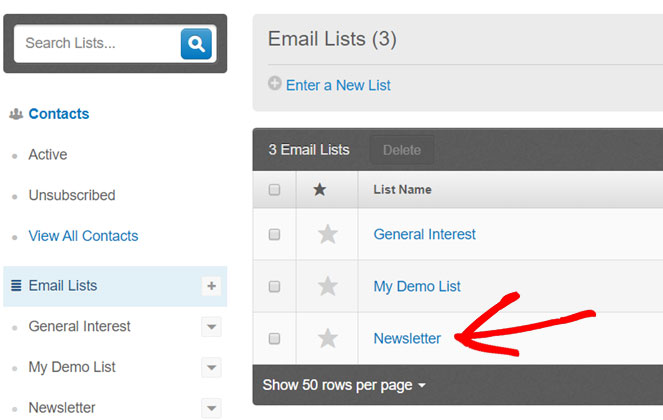
In the sidebar, look for Email Lists. You’ll find a ‘+’ button next to it. Click on it. Now specify the name of the new list (such as Newsletter) and click Add List. Refresh the page and you’ll see the new list.
Step 3: Create an Optin Form
Constant Contact comes with an optin form builder that lets you create basic lead generation forms.
The main drawback of the default optin forms that you create from Constant Contact is that they look generic and often fails to capture attention. Plus, they can annoy your potential subscribers especially if they’re not targeted to each individual visitors’ interest.
To create stunning high conversion optin forms, we use and recommend OptinMonster. OptinMonster is the best conversion optimization toolkit that lets you transform your visitors into subscribers and customers.
The best part is that it lets you target and personalize your offers based on behavior automation, so your visitors will only see optin forms that match their interest.
Check out our showcase of email popup examples for inspiration!
To create your own optin form, sign up for OptinMonster.
You can then install the free OptinMonster plugin on your blog, which allows you to connect your OptinMonster account with your WordPress blog.
Then log into your OptinMonster account and click Create Campaign.
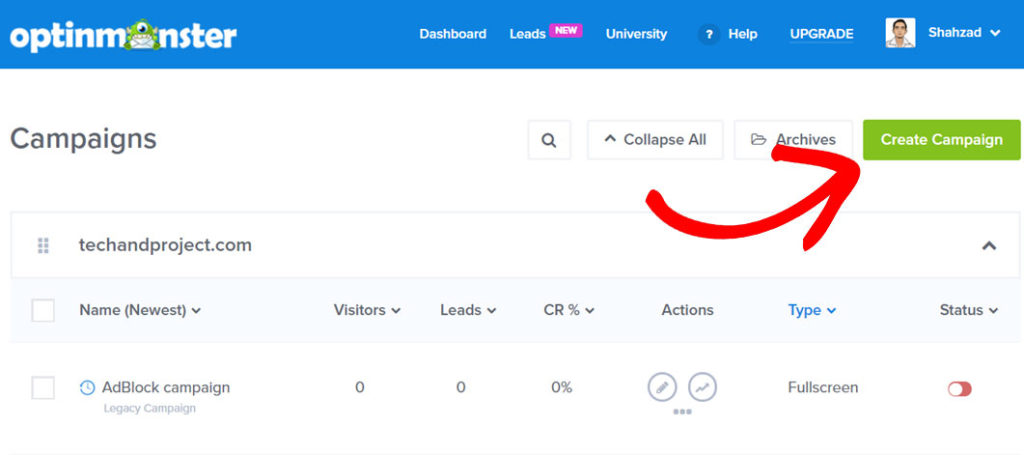
Now you’ll be asked to choose a campaign type. You can choose from 5 different campaign types: popup, fullscreen, slide-in, floating bar, and inline.
For the sake of this example, let’s choose popup.
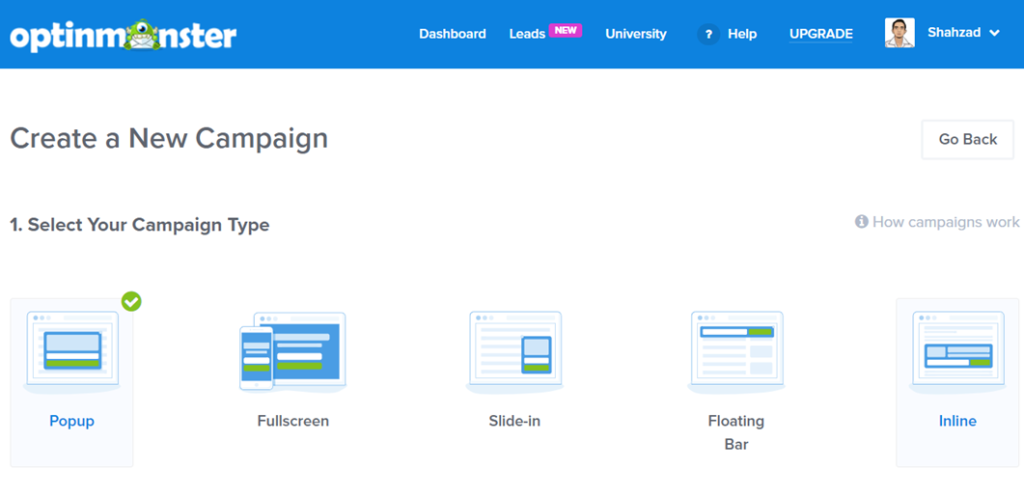
Next, you’ll need to choose a campaign template.
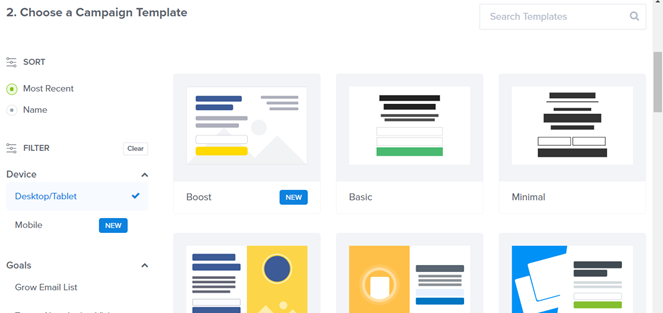
You can find dozens of different campaign templates from any niche.
As you select a campaign template, you’ll be asked to specify the name for your campaign and the site where you want to embed the form.
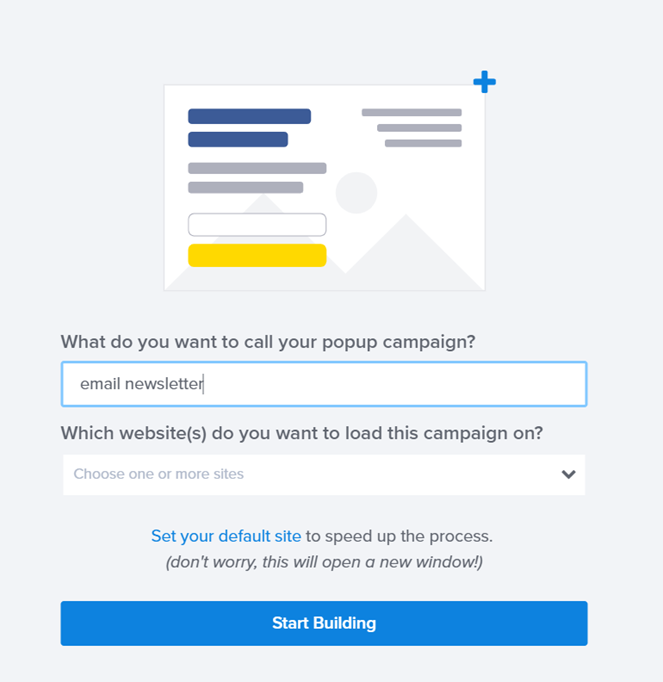
After you specify the name and the website, click Start Building.
Next, you’ll be directed to the optin form builder.
With OptinMonster’s powerful drag and drop editor, you can create visually stunning optin forms that are optimized for high click-through and conversion rates.
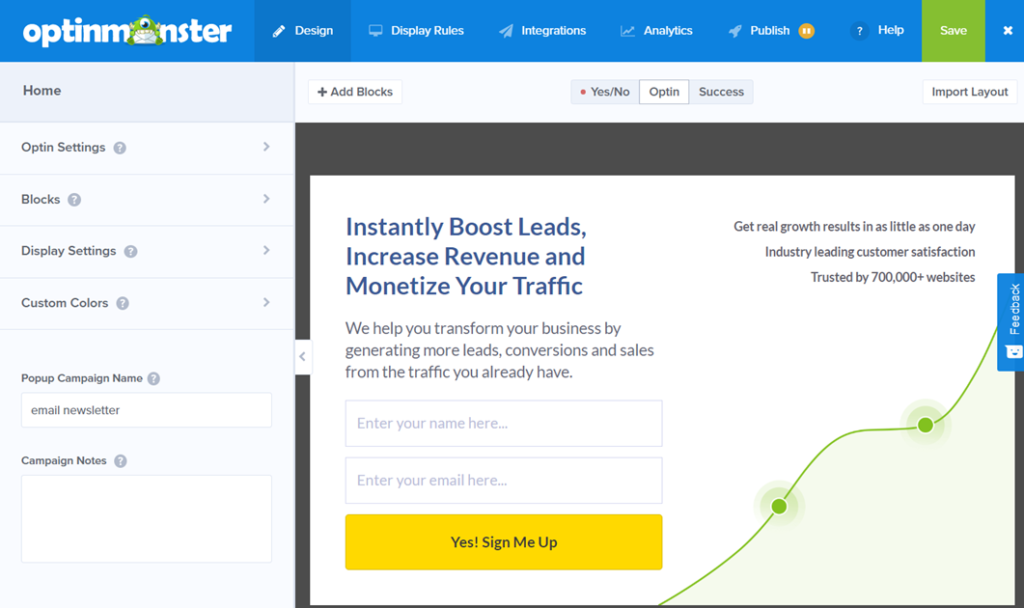
You can add any building block to the builder and customize it per your needs. You can also adjust different building blocks within the builder with drag and drop.
Make sure to customize the text and give your form a distinct look. After customizing the email design and text, save the campaign. Then, click Display Rules to set up targeting options.
OptinMonster comes with a lot of different targeting options. With these targeting features, you can detect your visitor’s behavior and display the right campaign at the right time when your users are more likely to convert.
Below are a few targeting options you can choose:
- Exit intent: With the exit-intent technology, the popup forms are only triggered when a user is about to leave your blog by detecting the mouse movement.
- Time on page / site: The forms are displayed based on the time spend.
- MonsterLink: A popup form is shown when a user clicks on a certain link.
- Scroll tracking: Campaigns are shown when a user scrolled X% of the page.
In this example, let’s choose exit detected, so our popup will be displayed when users are about to leave the blog.
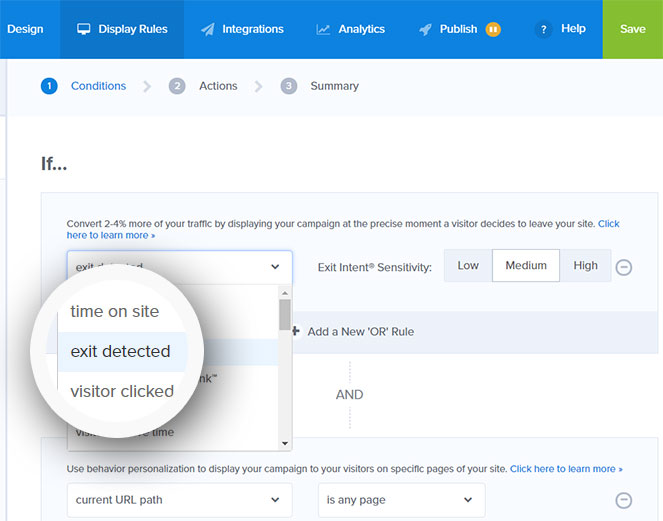
Not only exist popups are less intrusive, but it also converts an additional 2-4% of visitors into subscribers.
In the next step, you need to choose Optin view and then click Next Step.
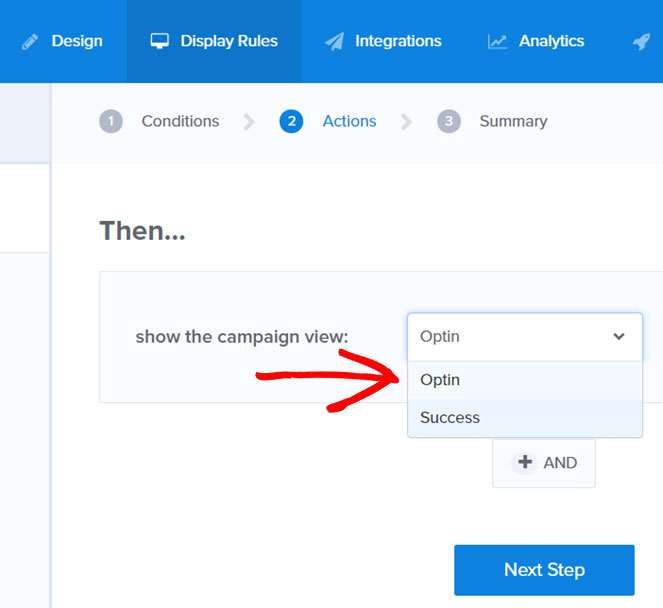
Finally, you’ll see when the optin forms will be shown to your visitors. In our case, users will see the form when they try to exit the blog from any page.
Step 4: Integrate a List With Your Form
Now that we’ve set up an optin form and configure the display rules, it’s time to integrate your form with your Constant Contact email list.
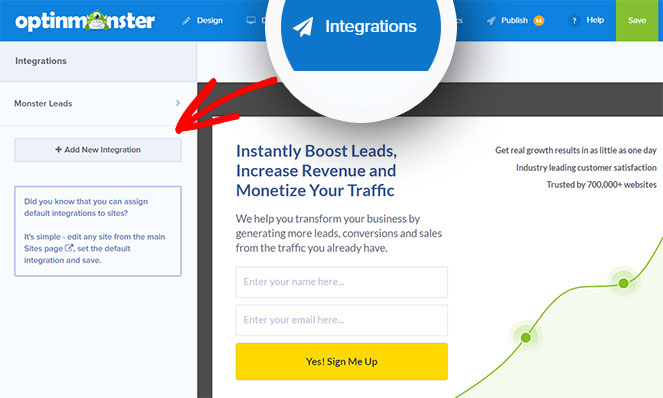
To connect your form with Constant Contact, click Integrations from the top menu. On the left task panel, click Add New Integration. Then, choose an email provider. In our case, it’s Constant Contact.
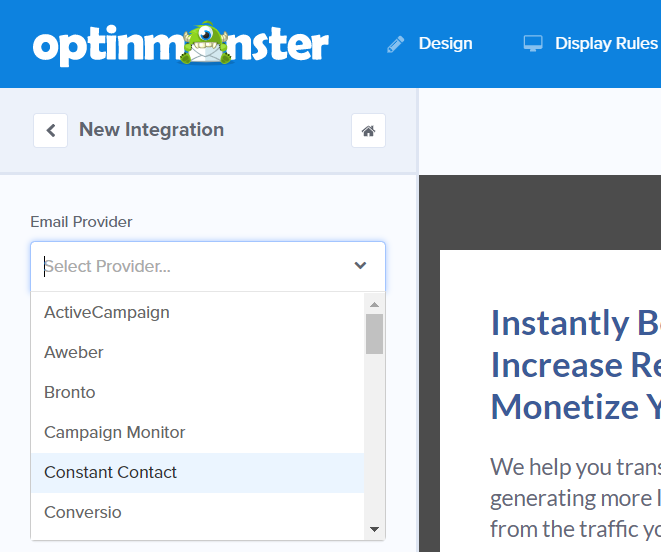
Then, click Register with Constant Contact.
A modal popup will appear asking you to allow authentication with Constant Contact. After allowing authentication, enter an account label.
This label allows you to differentiate this Constant Contact account with another account, which comes in handy if you have multiple Constant Contact accounts linked to your OptinMonster.
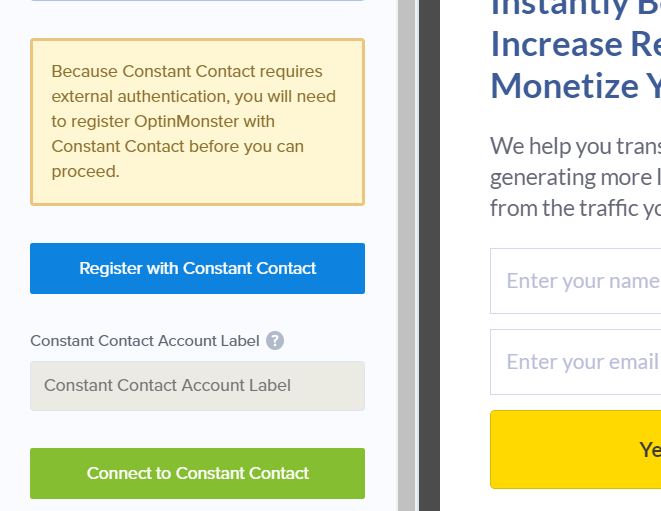
Then, click Connect to Constant Contact.
You can now choose a mailing list from the dropdown and save your campaign.
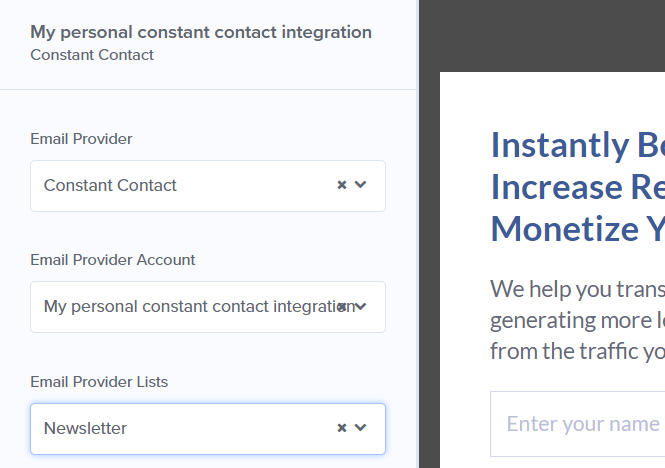
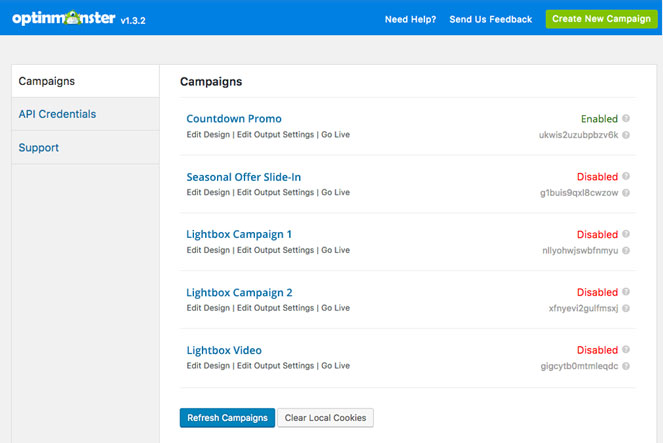
Finally, don’t forget to enable your form on your WordPress blog via the OptinMonster plugin you installed.
Step 5: Create an Email Newsletter Campaign
Now that you’ve set up an optin form and connect it with your email marketing service, Constant Contact, it’s time to create an send your email campaign.
To create a newsletter campaign, go back to your Constant Contact account. Navigate to Campaigns » Create. Then a popup will appear prompting you to select a campaign to get started.
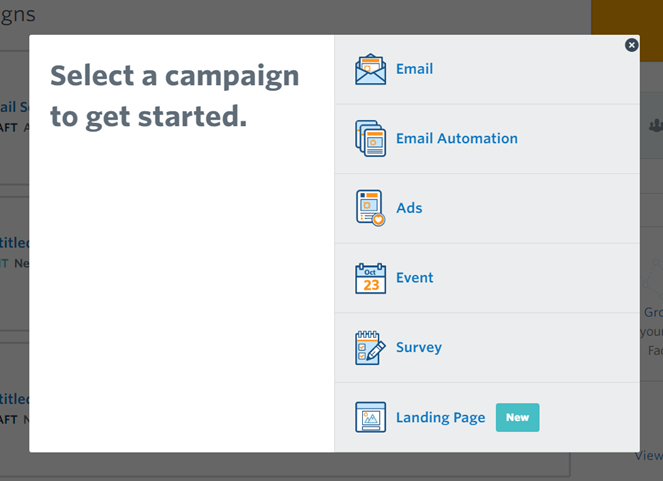
Since we wanted to make an email newsletter campaign, select Email.
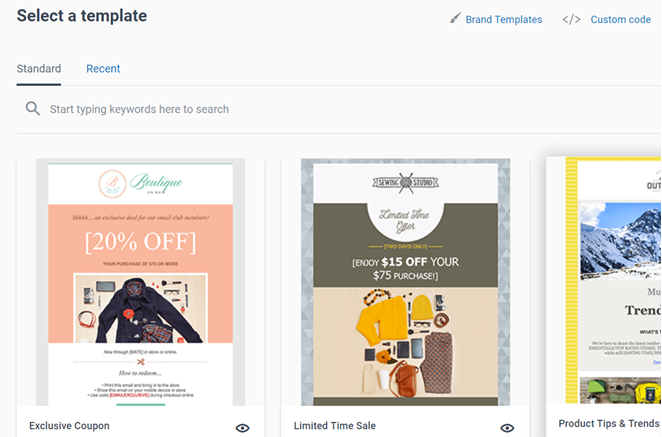
Next, you’ll be asked to select an email template for your newsletter campaign. Choose the right template.
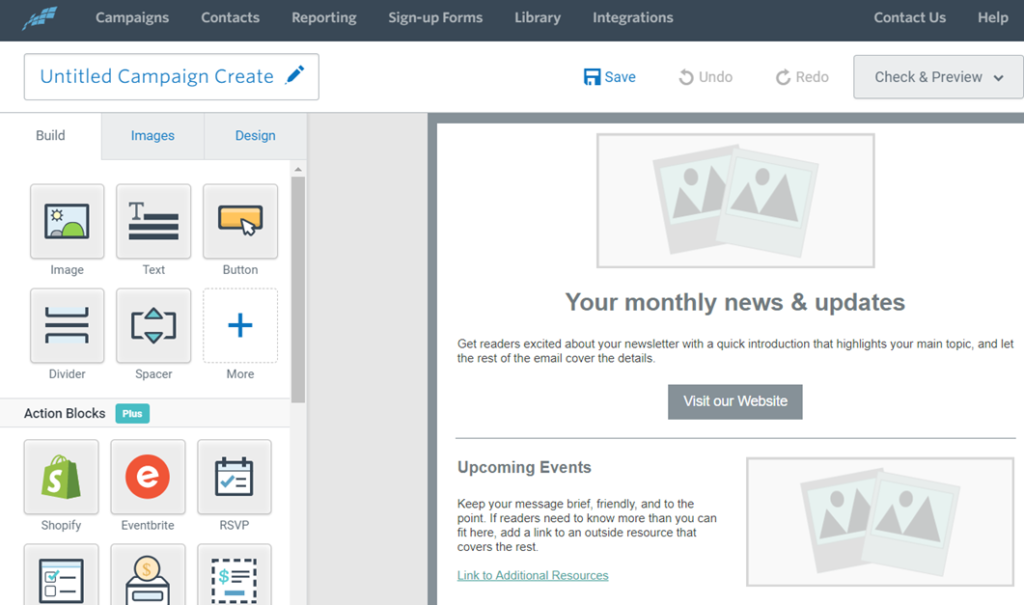
Create a new email with the template you’ve chosen. You can add building blocks from the left task panel to your builder. You can also drag and drop the blocks within the builder.
Preview your changes and finally save the email and click Continue.
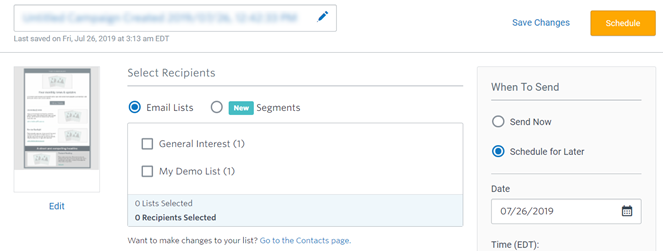
Then, you’ll be asked to choose the recipients and schedule your newsletter.
Before you start sending your newsletters, you might want to use this email newsletter checklist to make sure they’re ready.
Once done, click Schedule.
That’s it!
How to Create an Email Newsletter: FAQs
Before we wrap up this tutorial, I’d like to answer some of the most common questions I get about creating a newsletter.
What should I include in my newsletter?
If you’re a blogger, it’s a great idea to send a regular email newsletter to tell subscribers about new posts on your blog.
Besides new blog posts, you could also include exclusive content that they won’t find on your blog, such as interviews, coupons or sales, giveaways, and more.
You can choose to make your email plain text, or add images for interest.
Each email should have a single focus. This will keep your readers focused and engaged. If your email has too many calls to action, none of them will get the attention they deserve.
How do I make a good email newsletter?
Here are a few tips for you to make sure your email subscribers stay engaged and enjoy your emails:
- Work on improving your subject lines so that people are enticed to open your emails. You should a/b testing your subject lines before you send out your newsletter so that you pick the one that performs best.
- Make your emails short and scannable. Most people don’t have the time or patience to read long emails.
- Don’t send marketing emails too often – make sure you’re sending useful, quality content to keep your list engaged.
- Use an email newsletter design that will look good on a mobile device as well, since many people read emails on their phones.
How do I create a newsletter template?
Most good email service providers, like Constant Contact or Sendinblue, will come with plenty of pre-designed templates for you to use. They’re professionally designed and often categorized by niche or industry so you can find a design that works best for you.
If you want to design your own template, Constant Contact has a drag-and-drop builder you can use to customize your own design without needed to code.
How do I keep my newsletter emails out of spam?
There is no point in sending out newsletters if they end up in the spam folder. Over the years, spam detectors have become very powerful and have helped stopped email spam very efficiently. To ensure that your emails don’t end up in the spam folder, you need to take care of the following.
- Always use double opt-in, ask your users to verify their email address by clicking on the link that you have sent to their inbox.
- Don’t use an email address that was previously used to send spam emails. Always make sure that you use a professional email address that represents your website. For example, here is what a professional email address looks like, “[email protected]”.
- Never use misleading subject lines that annoy readers into marking your emails as spam. Always use a clear subject line that grabs the attention of the reader. If you are looking for good subject line ideas that will help you improve your open rate, then check out this excellent post by OptinMonster.
- Make sure you send relevant and interesting content to your readers. This will not only help you minimize the unsubscribe rates but also help in keeping your newsletter out of the spam folder.
- Your newsletter design should be appealing. Having a good design helps in keeping the readers hooked and lowers the chances of readers marking your email as spam. No one wants to read a poorly designed email.
- Use plain HTML to design your email newsletters. HTML attractively displays text and graphics, and on top of that, many email programs widely support it.
How do I get more newsletter subscribers?
There are tons of ways to get more people to join your email list, including:
- Running a viral giveaway
- Offering a free ebook in exchange for email addresses
- Adding signup links to your social media accounts
- Optimizing your sign up forms
…and lots more! Check out our guide on quick & easy hacks to grow your email list for more tips.
I hope this tutorial guide you through every aspect of building an email newsletter.
If you enjoyed this article, check out our guide on how to make more affiliate income.


great article thanks for sharing keep it up
Nice Information.
You’re welcome, Gautam!
Hello
I found your blog to be very useful and knowledgeable as it provides all the necessary information for a layman to understand the concept clearly.
Thank you
wow I REALLY NEED THIS INFORMATION THANKS FOR SHARING US.
Awesome in formation.Thanks so much for sharing this post.