
A re you looking to get a free SSL certificate to secure your blog, protect your visitors, and rank higher in search results?
Then you’re in the right place!
If you run a blog or website you’ve probably heard about SSL certificates and the idea of moving your domain from the old HTTP to the secure HTTPS version. It’s a very important topic!
In fact, this is something that will affect the security, performance and even the search engine rankings of your blog.
Today we’ve got a huge post filled with information about how to get a free SSL certificate and HTTPS for your blog, including why people are moving, what Google has been saying about it, and even step-by-step instructions on how to get it done for free.
This is a pretty complicated topic and so we’ve gone into lots of detail to try and make it as pain-free as possible. Have a read and jump in the comments if you’re still unsure.
Before we jump in, here’s a table of contents so you can skip ahead to the section you’re interested in.
We’re starting off by answering some common questions first, but you can just click here to skip to the tutorial if you prefer.
In This Guide:
Ready? Let’s begin!
What Is an SSL Certificate?
SSL stands for Secure Sockets Layer, and it’s basically technology that secures any data that’s transferred between your website and your visitors’ computers.
What data does it secure, exactly?
Whenever someone visits your website, information is passed back and forth between their browser and your website. That information can include sensitive data like:
- addresses
- credit card numbers
- email addresses
- passwords
- …and more
That means you’ll definitely need an SSL certificate if you have:
- a membership site that required users to login
- an online store that required users to pay for goods or services
What about blogs or other types of websites?
Well, Google recommends that all websites use SSL to protect your visitors, no matter what kind of website you have.
They even recognize secure sites by rewarding them with better search engine rankings, so you’ll get more traffic.
How Does an SSL Certificate Keep Information Secure?
An SSL certificate is a digital computer file (or a small piece of code) that enables encryption.
Just like you need a key to lock and unlock a door, encryption uses keys to lock and unlock information. And unless you have the right key, you can’t access the information.
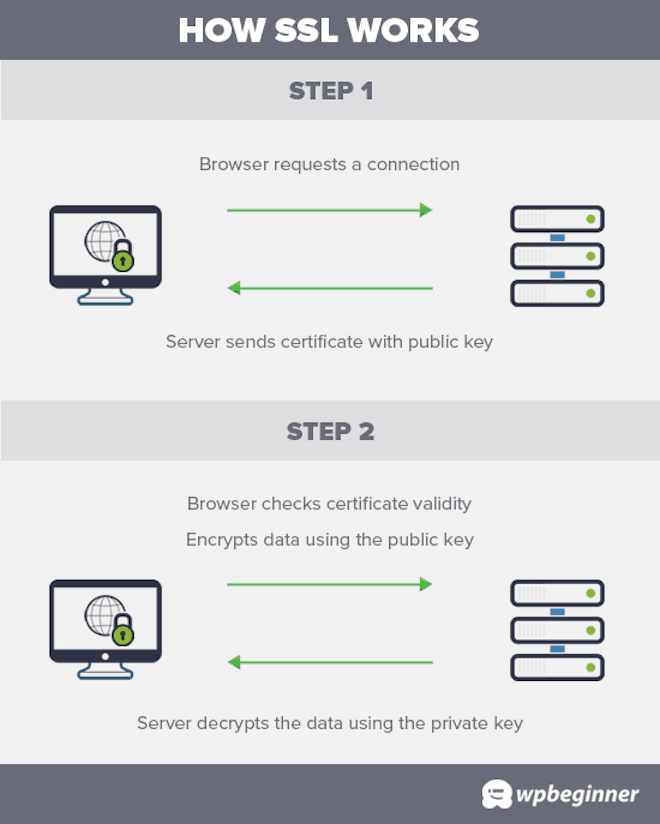
Each SSL session consists of two keys:
- The public key is used to encrypt (scramble) the information.
- The private key is used to decrypt (unscramble) the information and restore it to its original format so that it can be read.
Here’s how the SSL encryption process works:
How Do I Know if a Site Has a Valid SSL Certificate?
A website that is secured with a valid SSL certificate displays a padlock icon and HTTPS (Secure Hypertext Transfer Protocol) before the web address:
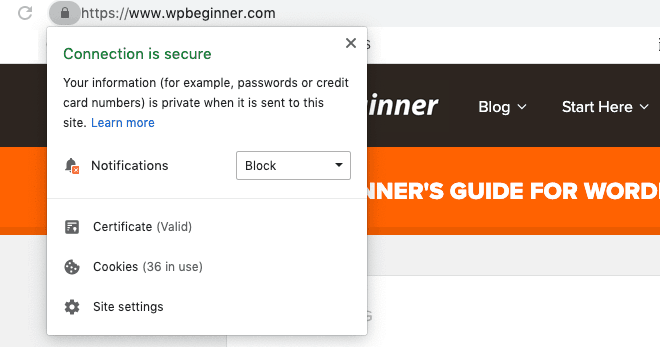
You can click the padlock to display information about the certificate.
What about for sites that don’t have an SSL certificate installed?
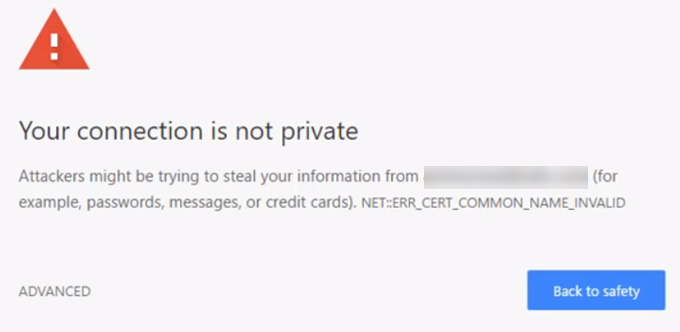
If you’re using the Google Chrome browser like over 70% of internet users, you’ll see an alarming warning message before you can even access the website.
If you visit the site anyway, you’ll see the warning “Not Secure” and HTTP (Hypertext Transfer Protocol) before the website address:
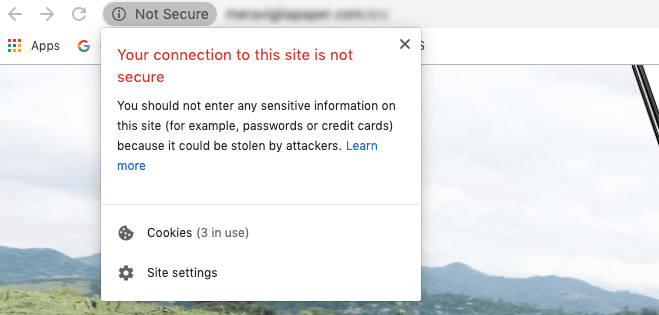
If you don’t want to scare off your potential website visitors, you’ll need to make your site secure!
How Much Does an SSL Certificate Cost?
SSL certificates vary in price depending on:
- the type of SSL Certificate
- the number of the domains and subdomains
- the period they cover
- the brand (Certificate Authority)
For example, leading domain registrar Domain.com offers 3 SSL certificates ranging from $35 – $269 a year.
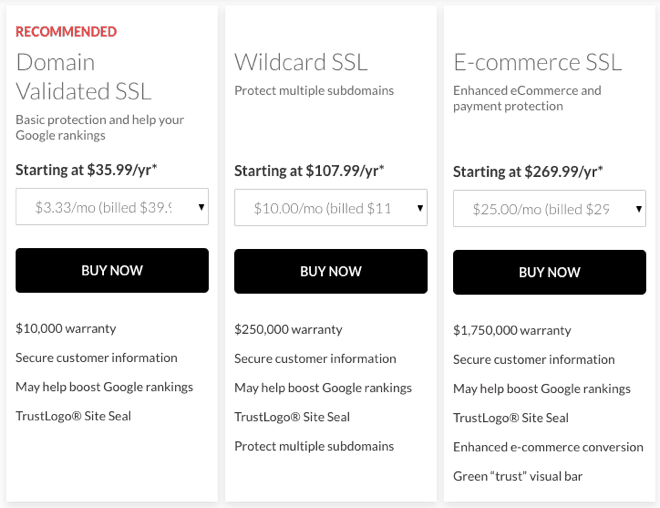
But for most bloggers, these prices may seem excessive, and in truth, you don’t need such a high level of security.
Thankfully, there’s a free SSL certificate provided by Let’s Encrypt, that will suit most bloggers.
How Can I Get a Free SSL Certificate?
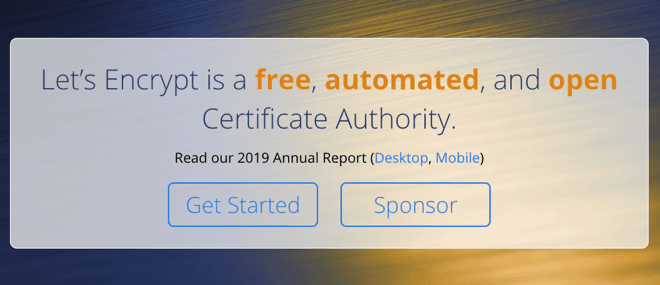
Let’s Encrypt is a non-profit Certificate Authority that provides free SSL certificates because they want to create a more secure and privacy-respecting web.
Since launching the project, many industry leaders like WPBeginner, Google Chrome, Facebook, Shopify, and Automattic have decided to sponsor them.
Although it’s easy to get a free Let’s Encrypt certificate, it’s not so easy to install one.
But now, many of the best WordPress hosting companies offer Let’s Encrypt and take care of the server-side installation.
Many of the top blog hosting companies offer a free SSL certificate with their hosting plans.
We recommend Bluehost because they also offer a free domain, great support, and reasonable prices for bloggers and other website owners.
Get a Free SSL Certificate With Bluehost!
Bluehost offers 99.99% uptime and lightning-fast loading times, plus a free domain and free SSL certificate.
Get started with bluehost todayWith Bluehost your free SSL certificate should install and activate itself when you signup. For existing users, you’ll find the free SSL certificate by visiting My Sites, moving along to the Security tab, and switching on the Free SSL Certificate for your website:
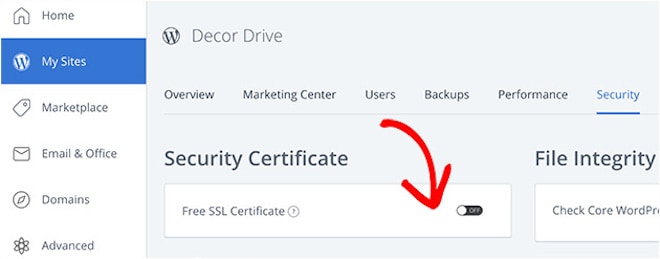
Other hosting companies will work similarly, but you can always check with the respective support team if you have any questions.
How to Install a Free SSL Certificate in WordPress
After you’ve switched on your free SSL Certificate in your web hosting dashboard, you’ll need to set up WordPress to start using HTTPS instead of HTTP in all your URLs.
The easiest way to do this is by installing and activating the Really Simple SSL plugin:

For more details, see our step-by-step guide on how to install a WordPress plugin.
Once you’ve installed and activated the plugin, it will run some initial checks and configuration in the background.
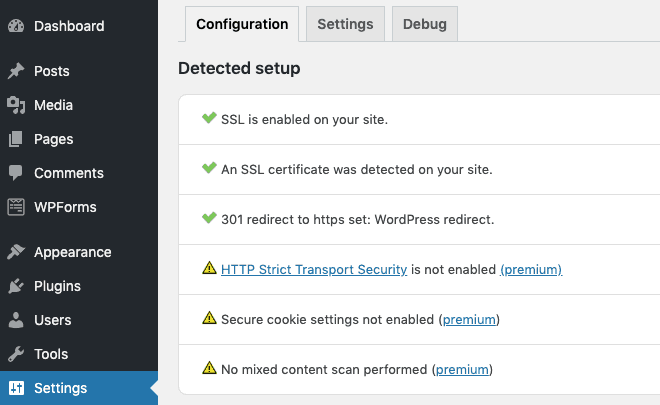
You’ll notice the successful green check marks against the top items. For the remaining items, you’ll need to install the premium version of the plugin.
Really Simple SSL Pro is an addon to Really Simple SSL, so you don’t have to deactivate the free version. The premium version makes further checks and locates what’s known as mixed content.
Note: Mixed content occurs when some of your content is HTTPS, while some remains as HTTP. Unfortunately, some theme and plugin files have poor coding, which keeps the content as HTTP rather than allowing it to switch to HTTPS.
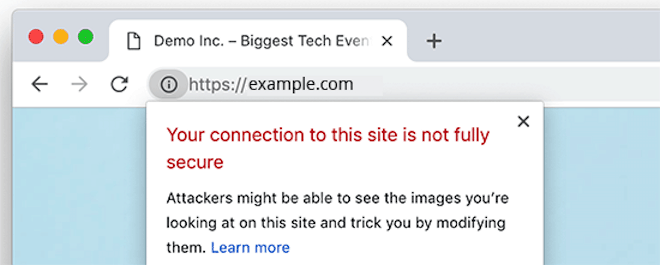
If you have mixed content, then your site won’t display the reassuring padlock symbol you expect to see with an SSL certificate. Instead, visitors see an information icon, and a message explaining that the site is not fully secure:
Really Simple SSL Pro detects the source of the mixed content that couldn’t be fixed automatically, and lets you fix it manually. The Pro version also provides further advanced options to:
- Enable HTTP Strict Transport Security
- Configure your site for the HSTS preload list
The Really Simple SSL plugin makes it easy to set up your free SSL certificate in WordPress. And that’s why we recommend it to all beginners.
But if you’re feeling more adventurous, then you can check out this tutorial, which shows you how to switch WordPress from HTTP to HTTPS with and without the plugin.
Two more settings to configure:
Google treats the HTTP and HTTPS versions of your website separately, so you’ll need to update Google Search Console and Google Analytics when you migrate your site from HTTP to HTTPS:
- Add the new HTTPS property to Google Search Console.
- Change the protocol of your website from HTTP to HTTPS in Google Analytics.
We hope this guide helped you get a free SSL certificate for your WordPress site and understand more about how SSL certificates work.
Thanks to the free SSL certificate from Let’s Encrypt and the Really Simple SSL plugin it’s easier than ever to switch your WordPress site to HTTPS. Your visitors will feel confident browsing your site safely and you’ll benefit from slightly higher search rankings.
Have you made the switch to HTTPS? Let us know in the comments below.


0 Comments
Join in. The comments are closed after 30 days.